sept 1981 3 speed Raleigh bomber restoration

thanks i appreciate the comments :)

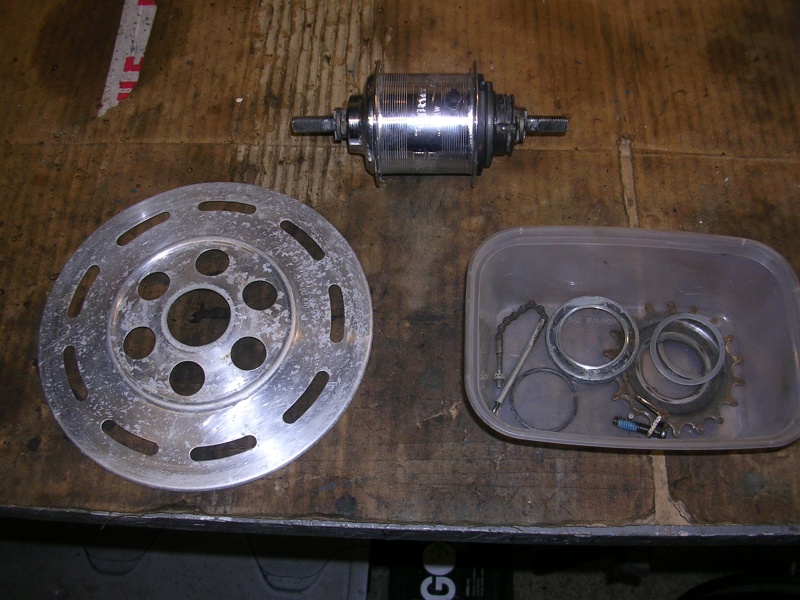
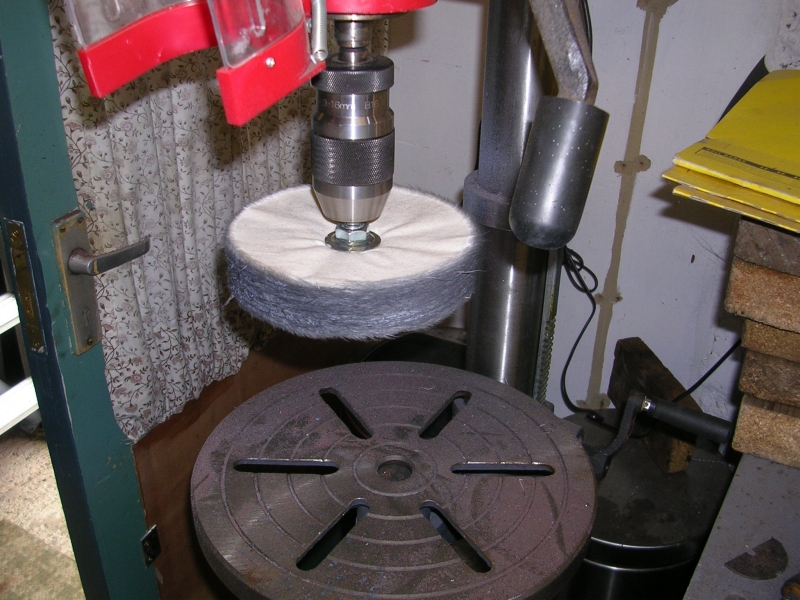
stripped the rear wheel down and cleaned up the bits I need to reuse. I will take the sturmey hub apart, also use a pillar drill mounted metal polishing mop too

bomber29.jpg


I stripped down the sturmey 3 speed hub following a guide on youtube :) 
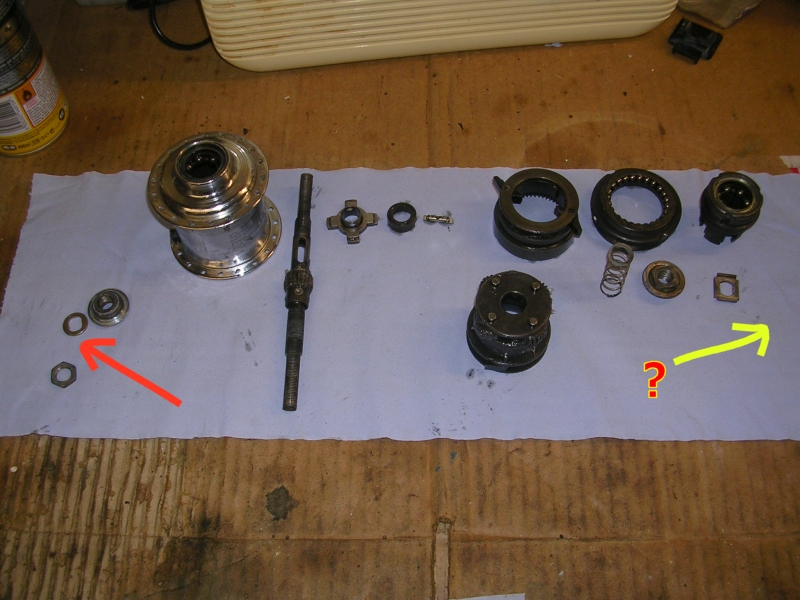
still a bit of black art to me, how actually alters output speed. in any case inside was all ok, bit of slack in one of the pawl springs which I stretched, and the tips of the clutch rotor are peened a little but not unserviceable.

one major problem is that the drive side had no lock nut on the bearing, and the offside had no lock washer, so it was basically the outter hub/spindle nuts stopping the bearings undoing themselves. I've scraped around in the drawer of random and found a lock washer (red arrow below) and glen from bomber forum has stuck a lock nut in the post for me :)

bomber32.jpg


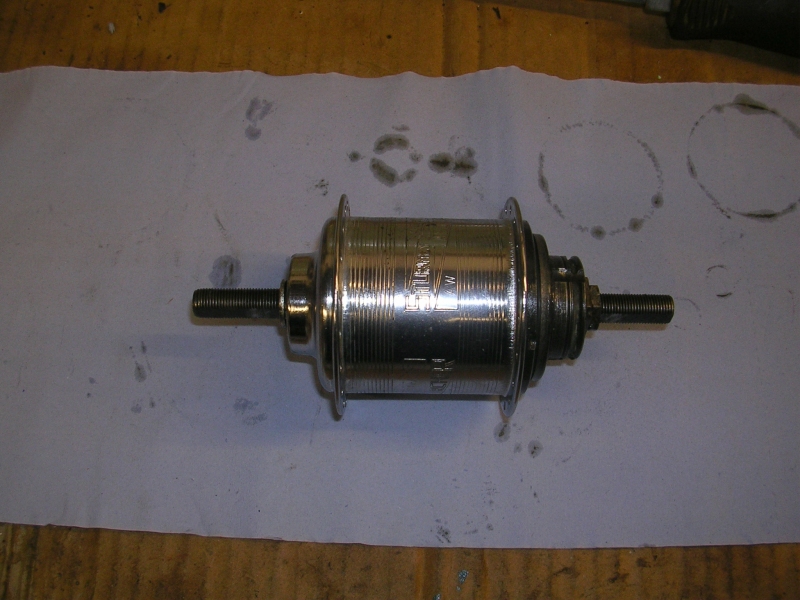
reassembled with the lock nut from the offside put onto the drive side

bomber33.jpg


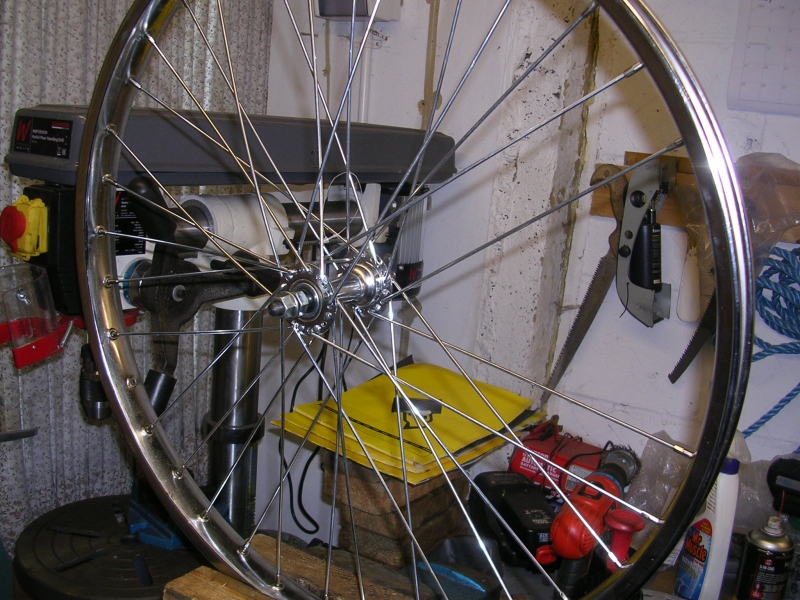
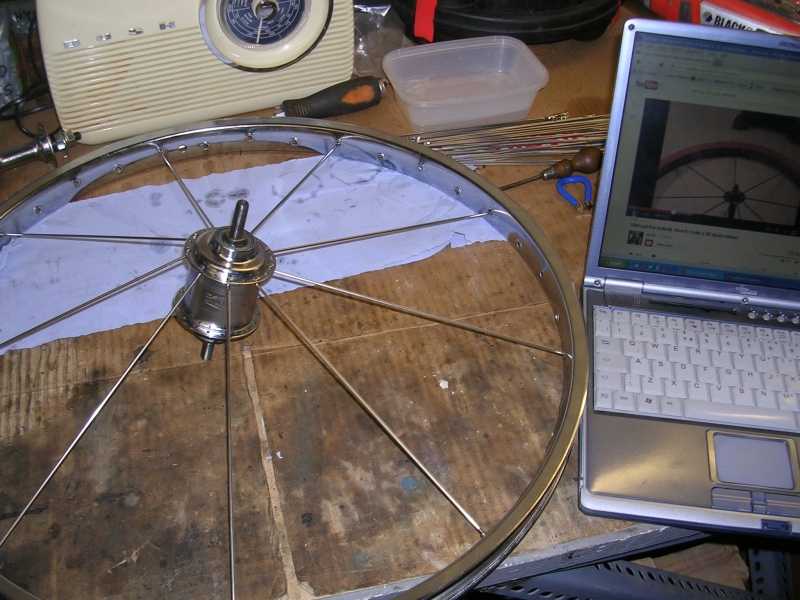
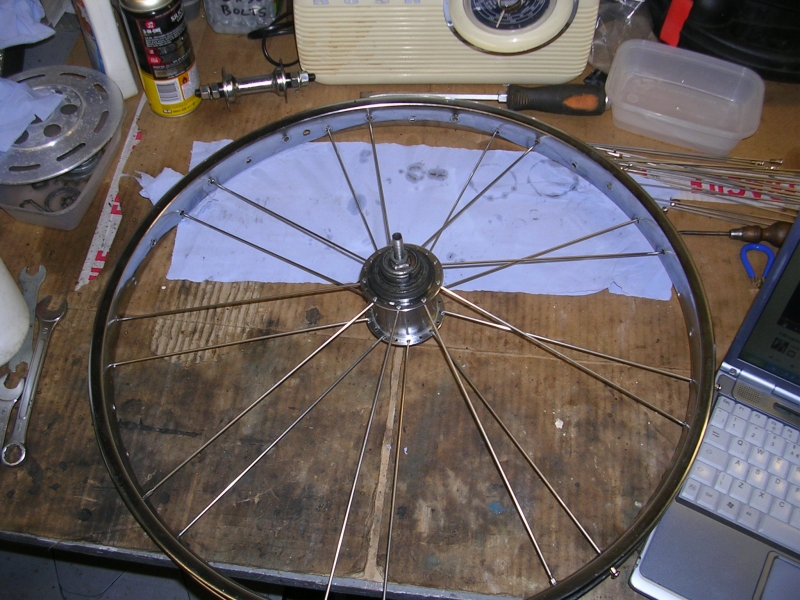
getting almost right up to date now, I re-laced the rear sturmey hub to the new USA rim using this guide on youtube http://www.youtube.com/watch?v=mIU6mi0K4Y4

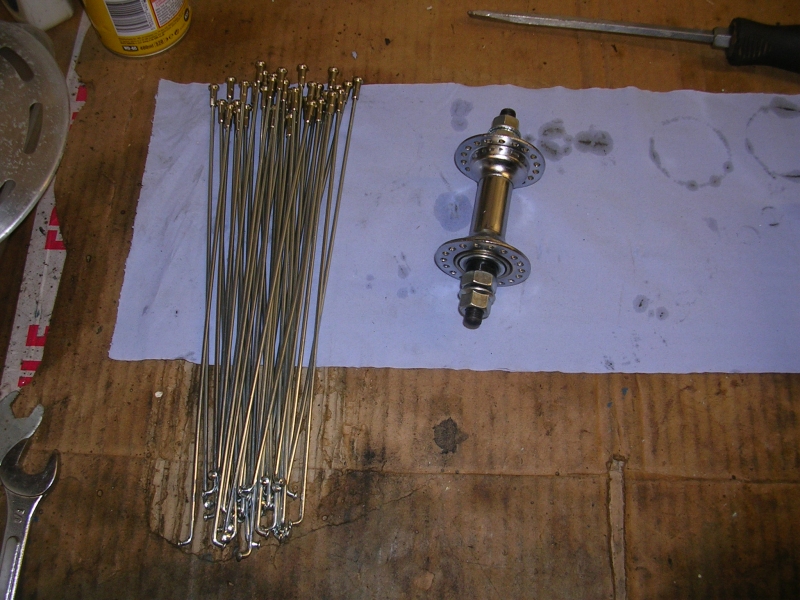
first I had to take all 36 spokes off and remove the hub from the donor wheel

bomber34.jpg


bomber35.jpg


then started to lace the sturmey hub to the new rim, with the 155mm sapim spokes

bomber36.jpg


bomber37.jpg


this picture is all finished but the nipples are only nipped up to take the slack out, as you can see the spokes are all squiffy from the lacing these will pull straight when its trued

bomber38.jpg


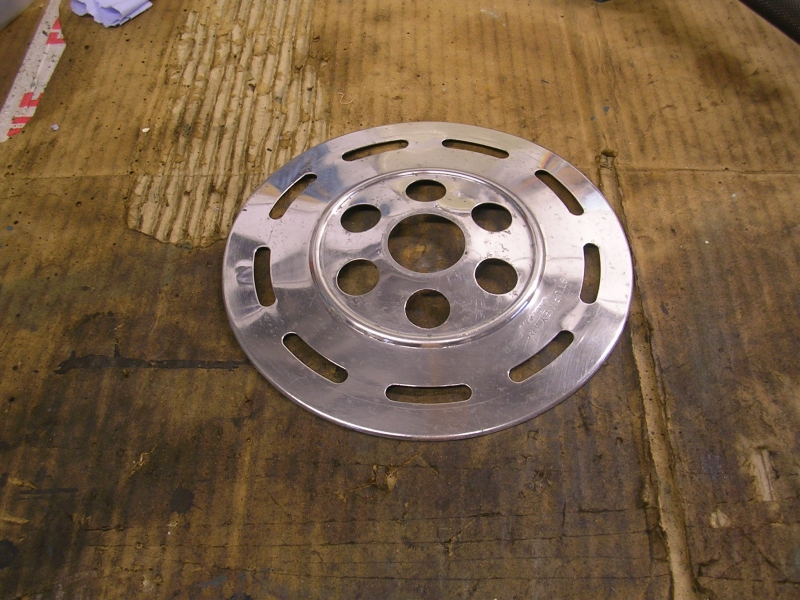
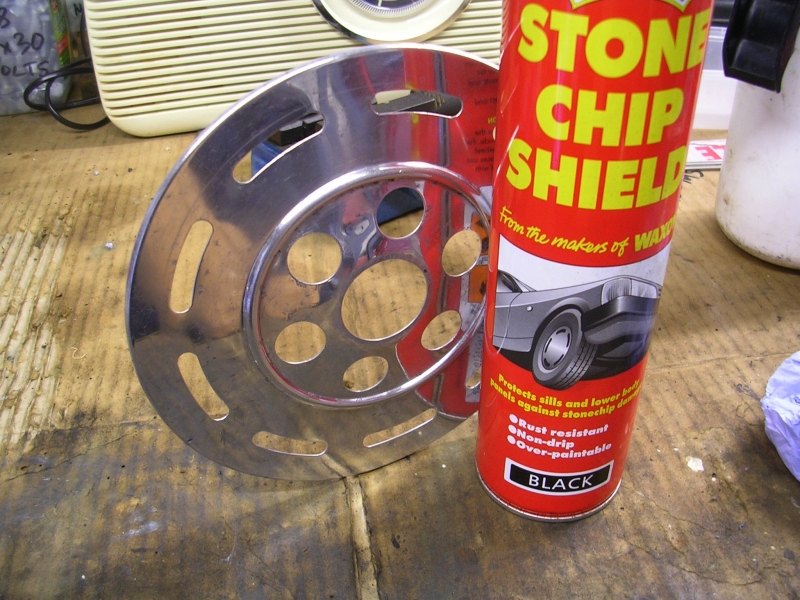
as per the previous threat i had a little pop with the polishing wheels on the chain guard, just to remind folk how it started off after degreasing

bomber29.jpg


I bought 3 polishing wheels, one course sisal, one cotton (pictured) and a fine felt, plus two compound bars, brown medium and blue fine.

bomber40.jpg


this is how it ended up, not that great because of the pitting which would only be removed by sanding first, but the guard is thin as paper to start with.

bomber41.jpg


bomber42.jpg
 
last update for now as i dont want to keep spamming the forum

i did a wet flat with 1500 paper

bomber31.jpg


then cutting the paint back on the frame, masked the seat tube just to show a before and after

bomber43.jpg


nice and reflective :)

bomber44.jpg


all 3 bits done

bomber45.jpg


after a degrease and new decals carefully fitted

bomber53.jpg
 
I know you probably don't want to hear this and I may be out of order because it's obvious a lot of work has gone into it but I remember these as a teenager and they were shoite so why are you bothering?
 
second paragraph, first post

darrenh":1batk30x said:
this bomber has been languishing in a shed at my nans for 25 odd years. it used to be my uncles when he was a teenager and I used to use it when I stayed at weekends, nan recently moved and we are clearing the out buildings. there's a fair bit of nostalgia and sentimental value surrounding this bike, said uncle died many years ago and I don't actually have a bike, so decided to save it from going in the skip and recommission it.
 
lol at the battery guzzling lights and rat-trap pedals... all too farmiliar.

I believe the correct name is "cotter pin" please :LOL:

Christ I've stripped a few of those SA 3 speed hubs in my time - cotton is your friend...

Good effort on the spray job :)
 
superstar1":2nm7z8m8 said:
I know you probably don't want to hear this and I may be out of order because it's obvious a lot of work has gone into it but I remember these as a teenager and they were shoite so why are you bothering?

Welcome newbie, maybe read the previous post on this thread, you hopefully understand!!

Great build and thats why we are all watching it's progress :)
 
I'd love to tackle a restoration that involves stripping and cleaning every single part. Look forward to see ing this finished, and the before and after comparison... :shock:
 
[fast show jesse] today I aff be mostly polishing chrome [/fast show jesse]

out on the decking, nice weather, bit of 10w40 and a bag of fine wire wool, doesnt sound like work does it !

bomber46.jpg


bomber47.jpg


all the bright work done. only downside is that the cow horns are absolutely shafted, it has large swathes of missing chrome at the bends (looks ok from a distance admitedly) not sure I have much choice than to spray them. will try the chrome finish enamel paint (supposed to be 80% reflective as actual chrome)

bomber48.jpg


did a bit of work on the mud guards, ended up grinding the heads off the bolts holding the stays. then attacked whatever was rusty with wire cup in angle grinder, this will be followed up by rust converted acid, then chrome spray on the inside. the outside will polish up ok I think

bomber62.jpg


bomber63.jpg


I got busy with the wire wool and oil, followed by the polishing mops. quite surprising how you can resurrect some stuff :)

bomber65.jpg


what do you reckon to that then ? when I got the bike I didnt even realise they were chrome guards !

bomber66.jpg
 

Latest posts

Back
Top