Hi, I used this site quite a bit while doing this project so thought I should sign up in case anyone was interested in the result...
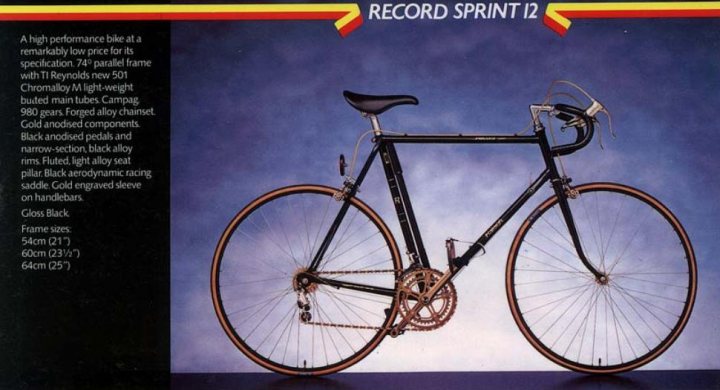
Some time in the mid ‘80s my dad bought himself a Raleigh Record Sprint that he used intermittently for a couple of years. After that it was consigned to a draughty shed and was only ever pulled out for the odd charity ride or local triathlon.
For years I’d been thinking about fixing it up but by the time I got round to taking a closer look, it was in a pretty sorry state. Despite having a bit of a cult following, the Record Sprint wasn’t particularly special in terms of components and restoring it was never going to make financial sense but I thought I’d give it a go anyway. I know next to nothing about bikes but the aim was to spend as little as possible and retain as many original parts as I could, although I was happy to updating bits & pieces if necessary.
The upside of it being neglected for many years was that it was largely original. As a teenager I’d stuck some Exage brake levers on it but the gold Weinmann ones were still in the garage. The only original parts that had disappeared without trace were the pedals, brake cables, seat and pump. Oh, and the decals – for some reason I peeled them off when I put the new brake levers on.
This is what it looked like originally...
...and having hacked away the ivy that had grown around it in the shed, this is what I was left with:
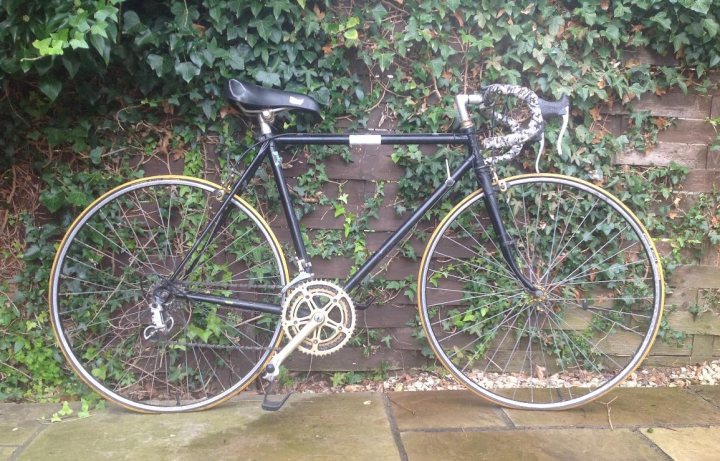

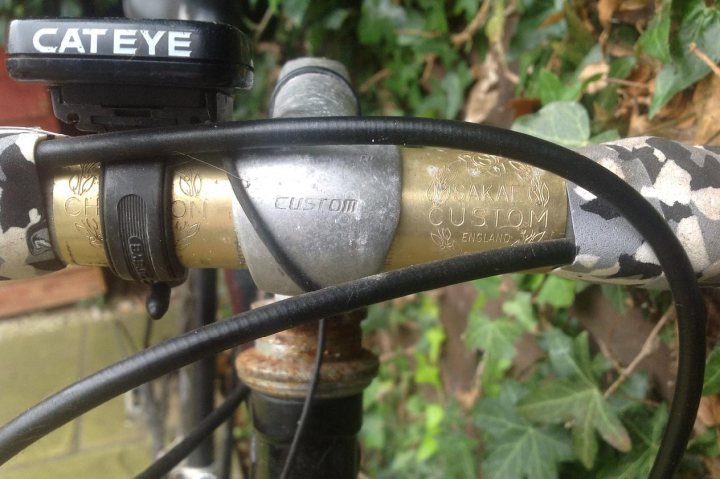
Not particularly promising, but the only real concerns were the rust on the chainstays, the corroded spokes and the fact that some of the gold anodising had been scuffed away.
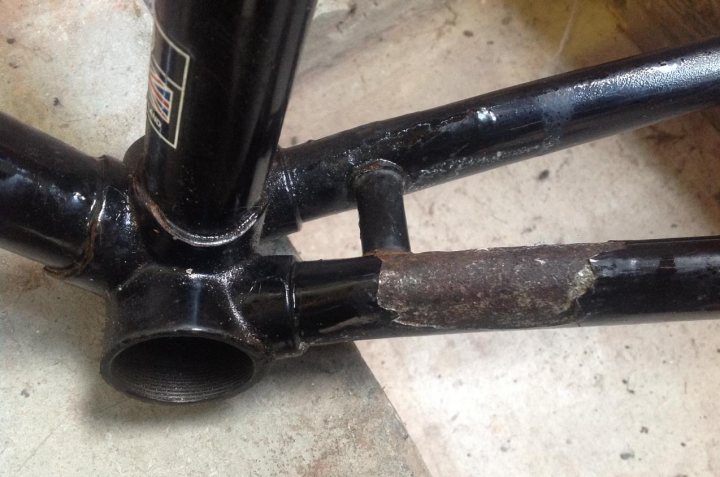
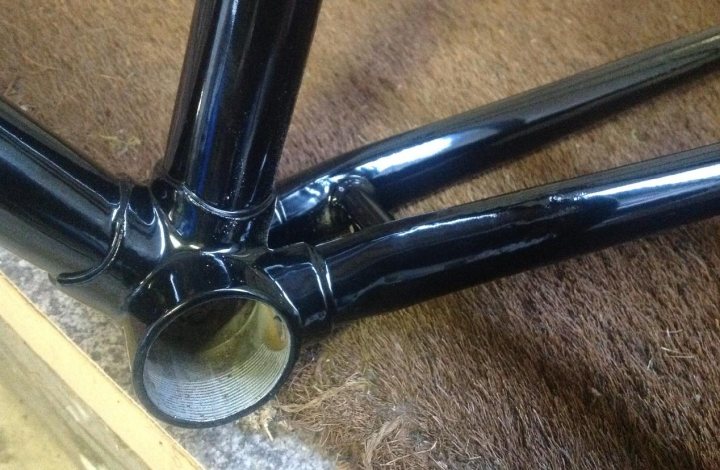
Stripping the bike down proved relatively straightforward once I’d bought a crank puller but removing the powder coating from the frame was a real pain - Nitromors had no effect so I found a bloke in an industrial unit who blasted it off and re-coated the frame.
Before:
After:
Perhaps I should have got some help with the anodised parts too but there didn’t seem much point in simply paying other people to do all the work so I thought I’d try to tart them up myself.
Having wasted a morning painstakingly trying to sand off the remains of the original finish, I discovered (thanks to Google) that simply chucking anodised parts in caustic soda for a minute or two is all you need to do to strip the surface away.
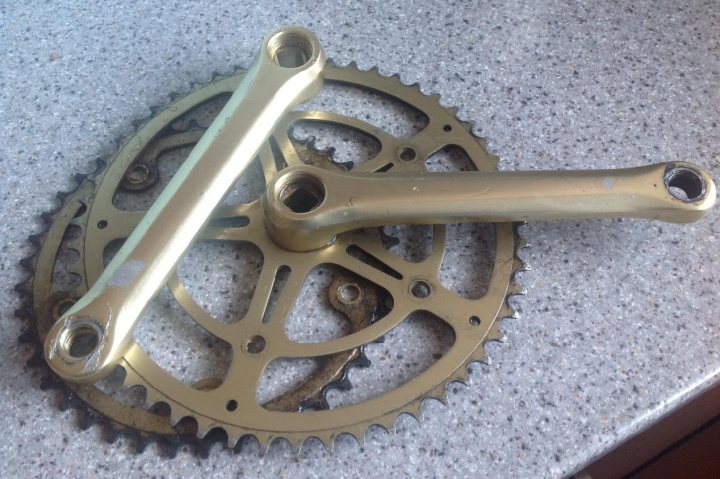
Sure enough, they came out silver (well, grey) and a bit of wet n dry and a tin of Silvo brought out the shine.
Now the hard part – re-anodising them. Beyond the basic concept, I didn’t know anything about anodising. All the websites I found seemed to imply that while the chemical process is simple, achieving a good finish could be tricky and required all sorts of specialised chemicals and equipment.
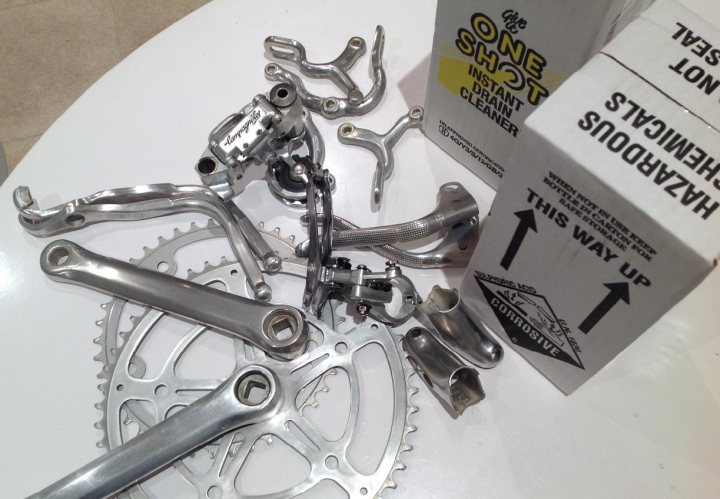
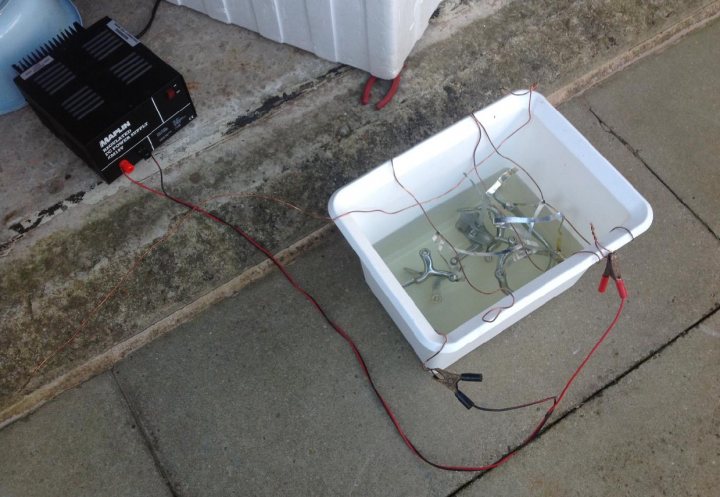
The more I read, the more complex it sounded. There were all sorts of variables – temperature, acid concentration, current, time, dye solution, cathode size, etc. On the grounds that various people claimed to have achieved good results with very different methods I just decided to experiment and see what happened. The first stumbling block was finding some sulphuric acid. Online suppliers seemed expensive and wanted to charge extra for specialist couriers. In the end, B&Q came up trumps – they sell something called One Shot Instant Drain Cleaner which turns out to be 91% sulphuric acid.
A bit of trial and error followed – various proportions of acid to water (and if you’re going to have a go, do make sure you add the acid to the water and NOT the other way around), different lengths of time, etc.
To cut a long story short, anodising the parts turned out to be pretty straightforward, it was dyeing them afterwards that proved trickier. Having said that, if you aren’t particularly fussed what shade you end up with, even the dyeing isn’t too difficult.
My problem was that the original gold finish was quite pale and proved awkward to replicate consistently. Clothes dye seemed to have no effect, nor did food dye. Printer ink seemed like the best household substance for colouring the parts.
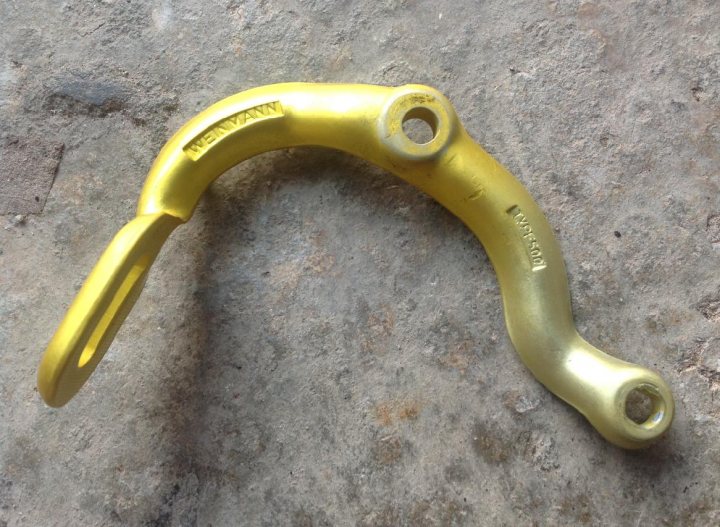
Leaving the parts in a dye solution of ink for too long resulted in a sort of acid yellow colour. Conversely, too short a time in the dye bath meant when the parts were boiled, the dye bled out before the pores were sealed by the hot water. To add to the problem, the concentration of the acid solution used to anodise the parts had a bearing on how much dye they absorbed. I was after the shade at the right-hand end of this test piece, but getting all the parts the correct shade proved a nightmare. Incidentally, the colour fade on the test piece was done by not mixing the water/acid solution, then standing the part vertically in the solution while anodising it.
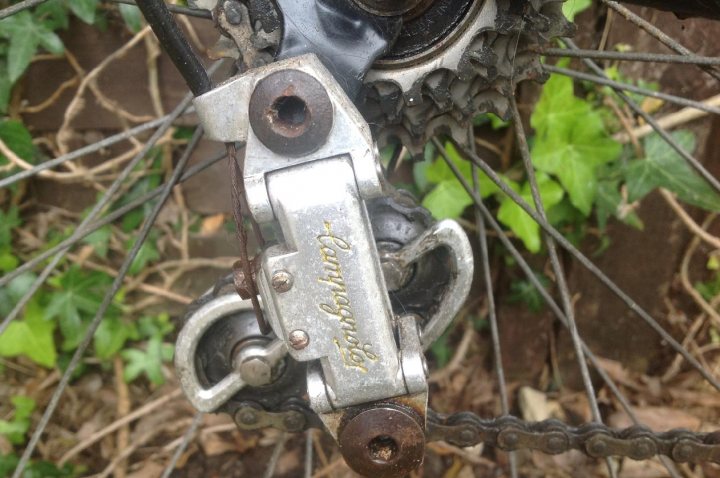
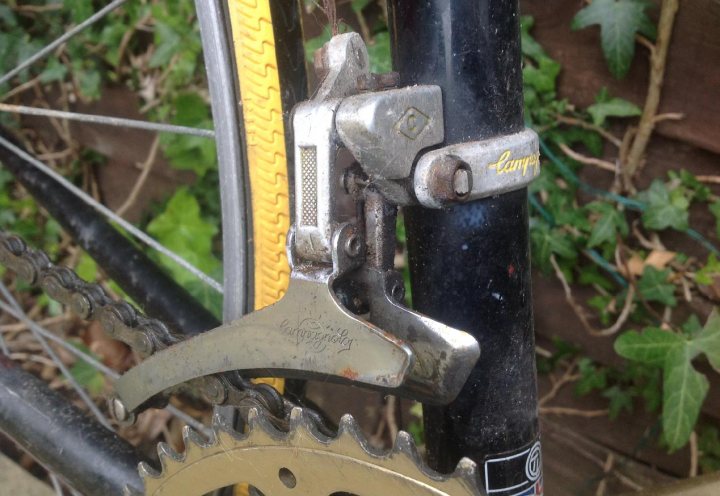
It didn’t help that the different components were made by different companies, using different alloys. Some took dye quite well, others not so well. At one point I considered doing the derailleurs and downtube shifters but the parts that were meant to be gold were causing enough headaches without adding to the problem by trying to dye bits that were originally silver.
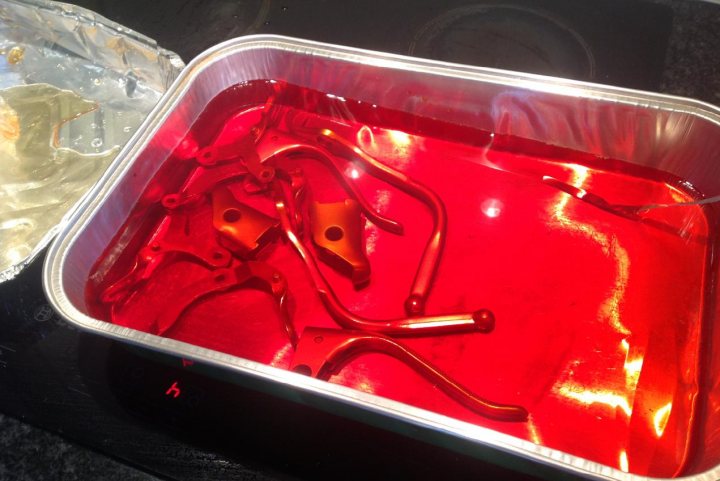
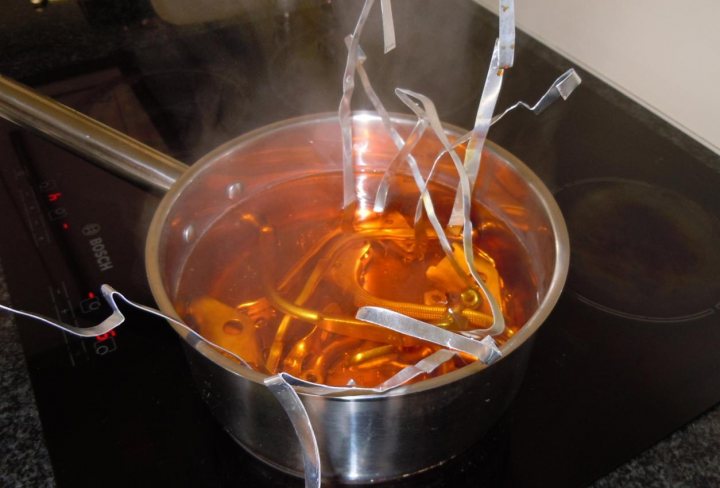
After several unsatisfactory efforts, I abandoned the printer ink and my dad repeated the process with some proper gold anodising dye he’d found online. You can see the colour being fixed in hot water here:
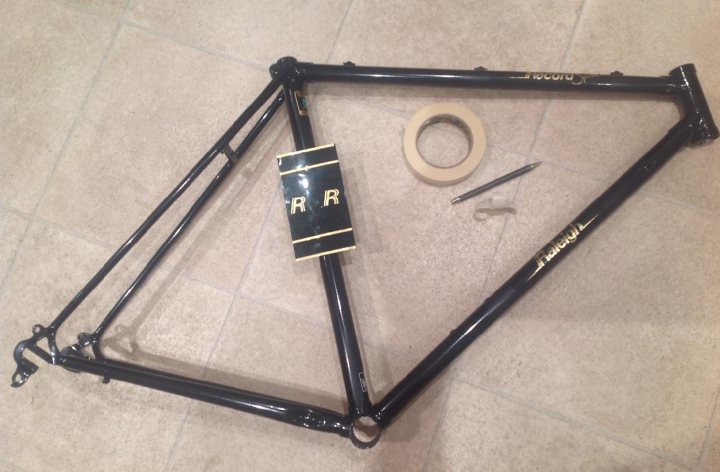
Back to the frame. The next job after having it powder-coated was to apply some new decals. As luck would have it, I’d stumbled across a NOS set on eBay a few years ago and bought them in case I ever got round to restoring the bike. Good job too, I’ve never seen another set since. You can buy repro ones for the Raleigh Record but not the Record Sprint.
I wasn’t sure whether to lacquer over them or not. With hindsight, I wish I hadn’t but there you go. Before applying them, I rubbed the frame down lightly to provide a key for the lacquer, as per the powder-coat bloke’s recommendation. I’m not the best painter in the world and tend to rely on wet n dry to get a smooth finish. Unfortunately, the decals are printed on silver vinyl and any over-zealous polishing of the lacquer began to reveal the silver backing of the decals. In the end, I had to settle for a less than perfect finish to the lacquer in some places in order to preserve the decals.
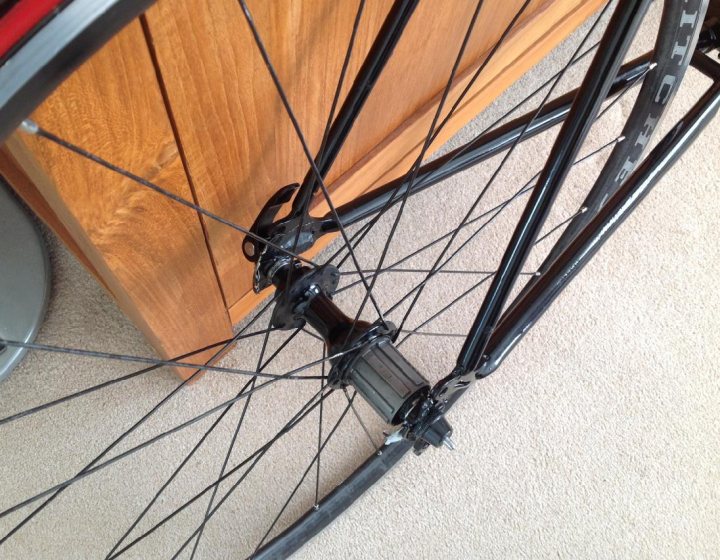
There were a few parts that were too manky for someone with my limited skills to sort out. Chief amongst them were the wheels - the hubs were fine but the rims were gouged and the spokes were shot. I did polish one or two spokes but within a week or so they were showing signs of corrosion again. I looked into stainless spokes but I’d have needed quite a few and the cost (not to mention the prospect of trying to tension them correctly) put me off a bit. In the end, I found a set of used Ritchey Pro wheels on eBay. Nothing fancy in wheel terms but infinitely lighter and more modern that the originals. The new hubs were wider than the frame was designed to accept but, being steel, there was enough flex in the frame to accept the wider wheels without any trouble. Unfortunately, the new wheels didn’t come with a cassette and the original one was no use as it was a screw-on freewheel. Having bought a new cassette and chain, it would probably have been cheaper to repair the old wheels – you live and learn I guess!
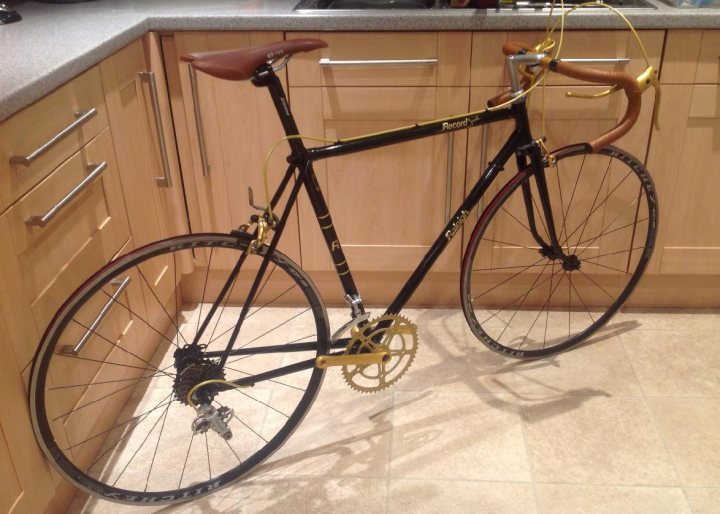
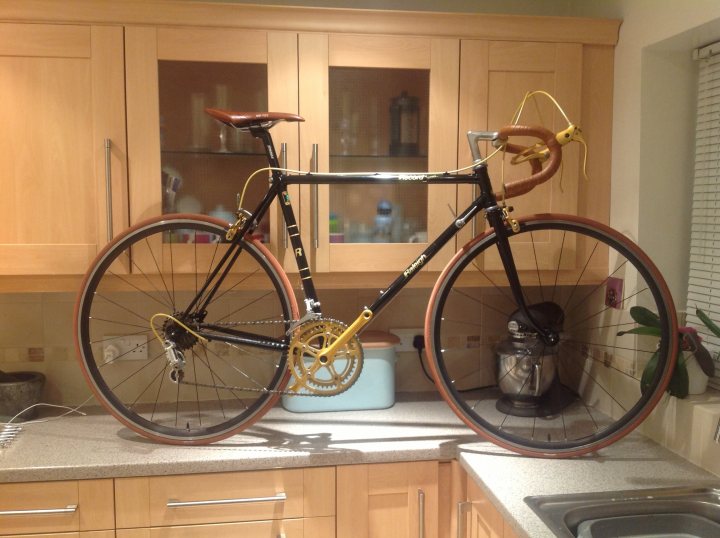
Aside from the wheels, I replaced the seat post, seat, brake cables, bar tape, tyres and headset. I thought I’d go for brown bar tape, seat and tyres just to make it stand out a bit but now I look around on the web it seems like a lot of other people with black bikes have had the same idea!
I’ve yet to decide what to do about pedals – flat ones don’t seem right for it but I’ve never tried SPD/SPD-SL ones and I’m not sure I can justify buying the pedals, the shoes, the cleats, etc.
I daren’t begin to add up how much it all cost but I’ve learned a bit in the process and it’s kept me out of trouble for a few weeks.
Some time in the mid ‘80s my dad bought himself a Raleigh Record Sprint that he used intermittently for a couple of years. After that it was consigned to a draughty shed and was only ever pulled out for the odd charity ride or local triathlon.
For years I’d been thinking about fixing it up but by the time I got round to taking a closer look, it was in a pretty sorry state. Despite having a bit of a cult following, the Record Sprint wasn’t particularly special in terms of components and restoring it was never going to make financial sense but I thought I’d give it a go anyway. I know next to nothing about bikes but the aim was to spend as little as possible and retain as many original parts as I could, although I was happy to updating bits & pieces if necessary.
The upside of it being neglected for many years was that it was largely original. As a teenager I’d stuck some Exage brake levers on it but the gold Weinmann ones were still in the garage. The only original parts that had disappeared without trace were the pedals, brake cables, seat and pump. Oh, and the decals – for some reason I peeled them off when I put the new brake levers on.
This is what it looked like originally...
...and having hacked away the ivy that had grown around it in the shed, this is what I was left with:
Not particularly promising, but the only real concerns were the rust on the chainstays, the corroded spokes and the fact that some of the gold anodising had been scuffed away.
Stripping the bike down proved relatively straightforward once I’d bought a crank puller but removing the powder coating from the frame was a real pain - Nitromors had no effect so I found a bloke in an industrial unit who blasted it off and re-coated the frame.
Before:
After:
Perhaps I should have got some help with the anodised parts too but there didn’t seem much point in simply paying other people to do all the work so I thought I’d try to tart them up myself.
Having wasted a morning painstakingly trying to sand off the remains of the original finish, I discovered (thanks to Google) that simply chucking anodised parts in caustic soda for a minute or two is all you need to do to strip the surface away.
Sure enough, they came out silver (well, grey) and a bit of wet n dry and a tin of Silvo brought out the shine.
Now the hard part – re-anodising them. Beyond the basic concept, I didn’t know anything about anodising. All the websites I found seemed to imply that while the chemical process is simple, achieving a good finish could be tricky and required all sorts of specialised chemicals and equipment.
The more I read, the more complex it sounded. There were all sorts of variables – temperature, acid concentration, current, time, dye solution, cathode size, etc. On the grounds that various people claimed to have achieved good results with very different methods I just decided to experiment and see what happened. The first stumbling block was finding some sulphuric acid. Online suppliers seemed expensive and wanted to charge extra for specialist couriers. In the end, B&Q came up trumps – they sell something called One Shot Instant Drain Cleaner which turns out to be 91% sulphuric acid.
A bit of trial and error followed – various proportions of acid to water (and if you’re going to have a go, do make sure you add the acid to the water and NOT the other way around), different lengths of time, etc.
To cut a long story short, anodising the parts turned out to be pretty straightforward, it was dyeing them afterwards that proved trickier. Having said that, if you aren’t particularly fussed what shade you end up with, even the dyeing isn’t too difficult.
My problem was that the original gold finish was quite pale and proved awkward to replicate consistently. Clothes dye seemed to have no effect, nor did food dye. Printer ink seemed like the best household substance for colouring the parts.
Leaving the parts in a dye solution of ink for too long resulted in a sort of acid yellow colour. Conversely, too short a time in the dye bath meant when the parts were boiled, the dye bled out before the pores were sealed by the hot water. To add to the problem, the concentration of the acid solution used to anodise the parts had a bearing on how much dye they absorbed. I was after the shade at the right-hand end of this test piece, but getting all the parts the correct shade proved a nightmare. Incidentally, the colour fade on the test piece was done by not mixing the water/acid solution, then standing the part vertically in the solution while anodising it.
It didn’t help that the different components were made by different companies, using different alloys. Some took dye quite well, others not so well. At one point I considered doing the derailleurs and downtube shifters but the parts that were meant to be gold were causing enough headaches without adding to the problem by trying to dye bits that were originally silver.
After several unsatisfactory efforts, I abandoned the printer ink and my dad repeated the process with some proper gold anodising dye he’d found online. You can see the colour being fixed in hot water here:
Back to the frame. The next job after having it powder-coated was to apply some new decals. As luck would have it, I’d stumbled across a NOS set on eBay a few years ago and bought them in case I ever got round to restoring the bike. Good job too, I’ve never seen another set since. You can buy repro ones for the Raleigh Record but not the Record Sprint.
I wasn’t sure whether to lacquer over them or not. With hindsight, I wish I hadn’t but there you go. Before applying them, I rubbed the frame down lightly to provide a key for the lacquer, as per the powder-coat bloke’s recommendation. I’m not the best painter in the world and tend to rely on wet n dry to get a smooth finish. Unfortunately, the decals are printed on silver vinyl and any over-zealous polishing of the lacquer began to reveal the silver backing of the decals. In the end, I had to settle for a less than perfect finish to the lacquer in some places in order to preserve the decals.
There were a few parts that were too manky for someone with my limited skills to sort out. Chief amongst them were the wheels - the hubs were fine but the rims were gouged and the spokes were shot. I did polish one or two spokes but within a week or so they were showing signs of corrosion again. I looked into stainless spokes but I’d have needed quite a few and the cost (not to mention the prospect of trying to tension them correctly) put me off a bit. In the end, I found a set of used Ritchey Pro wheels on eBay. Nothing fancy in wheel terms but infinitely lighter and more modern that the originals. The new hubs were wider than the frame was designed to accept but, being steel, there was enough flex in the frame to accept the wider wheels without any trouble. Unfortunately, the new wheels didn’t come with a cassette and the original one was no use as it was a screw-on freewheel. Having bought a new cassette and chain, it would probably have been cheaper to repair the old wheels – you live and learn I guess!
Aside from the wheels, I replaced the seat post, seat, brake cables, bar tape, tyres and headset. I thought I’d go for brown bar tape, seat and tyres just to make it stand out a bit but now I look around on the web it seems like a lot of other people with black bikes have had the same idea!
I’ve yet to decide what to do about pedals – flat ones don’t seem right for it but I’ve never tried SPD/SPD-SL ones and I’m not sure I can justify buying the pedals, the shoes, the cleats, etc.
I daren’t begin to add up how much it all cost but I’ve learned a bit in the process and it’s kept me out of trouble for a few weeks.
")