RickTheUncivil
Old School Grand Master
- Feedback
- View
Yes, I know it’s now summer …..
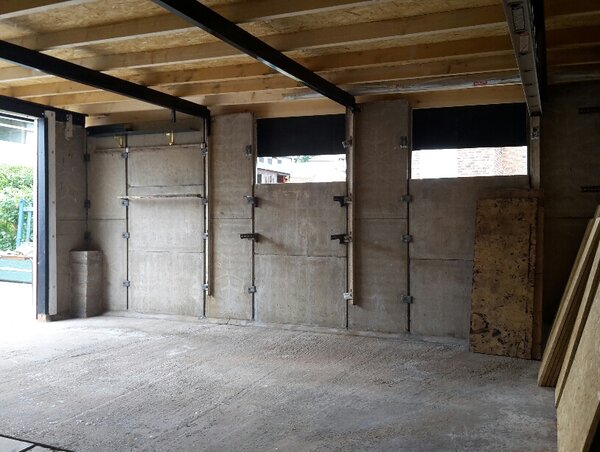
So our old garage was a bit tired. The roof leaked, the walls leaked, the door… well let’s just say it wasn’t watertight. It’s a sectional concrete construction almost 5m each side, my grandfather and uncle build it way back in the early 70s and it has had almost zero maintenance since. But this is the designated man cave so it needed sorting.
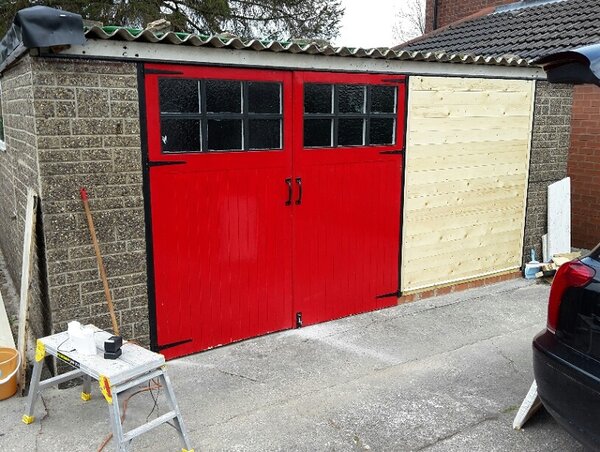
So in early March I ripped the doors off. That was great fun as it was a double-wide and a bit floppy, with counterweights at each side which I had to detach while holding the door up. On my own. Got that smashed and skipped with liberal application of saw and hammer. Built a wooden frame, hung some ready made doors from B&Q and filled in the leftover space with T&G planks. I painted the doors and frame before assembly so it came together really quickly, just needed lick of varnish on the T&G. Done. The boy chose the colour, he wanted me to make it look like darth maul, this was my compromise. I tried to explain that the neighbours opposite might think we were a bit odd of we put what is basically a massive devil head on the front of the building. You can make out the green tarp sheet on the roof to keep the rain off the leaky bits and some lengths of DPC down the sides to weatherproof the rotten woodwork. Very classy.
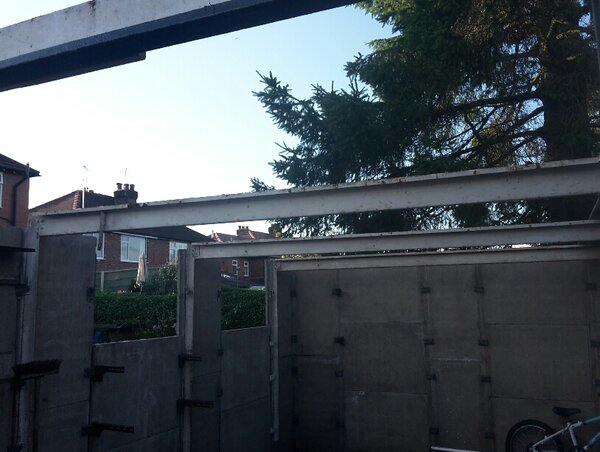
Then I have been busy with the new baby, working for a living, and waiting for some good weather so I could empty the contents of the garage onto the lawn and rip the roof off. I pencilled in some time while the kids were at school so a mate of mine could be available to help out with this one. The old asbestos corrugated sheets were 8 and 10 foot long buggers so weighed a bit. Of course we had proper RPE and all the clobber, proper job, but it turned out to be the hottest day of the year so we were in a right state by the end of that days work. Gave everything a good wash down and sweep out to get rid of all the muck and dust, 50 years of cobwebs and dropped screws. Took a wire brush to the metal frame (quite nasty rusty in places!) then another wash down and a dab of hammerite, should be good for another 40+ years now.
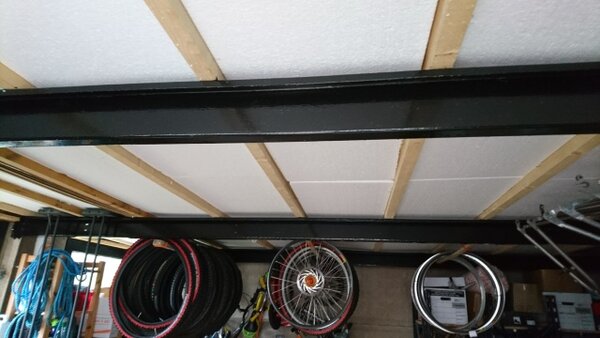
The roof itself was a fairly simple affair with beams front to back and OSB sheets screwed on top. I had the sheets trimmed to size by the timber merchant so it went together nice and easy, definitely a good idea! Wooden fascia to tidy up the edges and a rubber sheet stuck on top finished the job. I can really recommend the rubber sheet way. I struggled to fit it (by myself) coz its huge and heavy so definitely would have benefited from a second (or preferably fifth) pair of hands but it was much quicker and easier than sticking felt down and should last much longer too. It’s a little more expensive but not much, and hopefully will last twice as long so will work out cheaper in the long run. Also I could roll it out and cover everything over for a few days between starting and finishing the job.
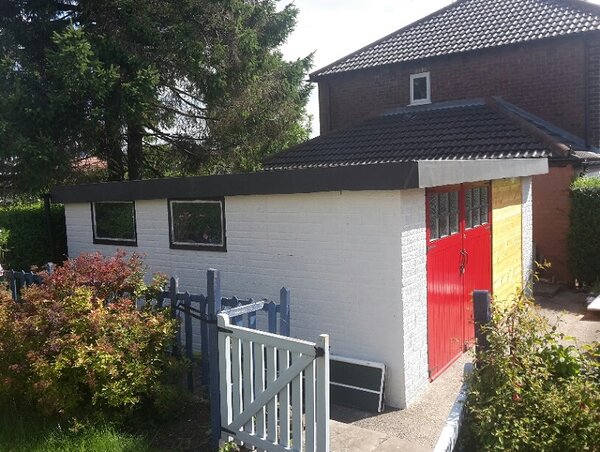
Finishing touches… stripped the knackered putty from the windows and stuck in some new, sand and lick of paint on the frames and they look much better. I also decided to paint the walls. I am not a fan of the pebbledash look so glad to brighten it up. Sandtex ‘chalk hill’ was approved by the boss. And as the garage is in the garden it makes the whole place a bit nicer too. Needs a second coat at some point but it will do for now.
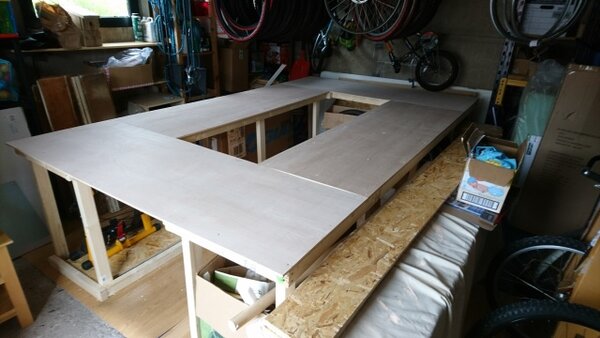
I have got a workbench to construct at some point and I’m leaning heavily towards a tool wall / shadow board. Longer term I need to get power down there. I have some small solar which is just about enough to keep the alarm going and occasionally run a small light, but I currently run an extension lead from the shed when I need to do anything with tools or listen to tunes while I work which is functional but not great.
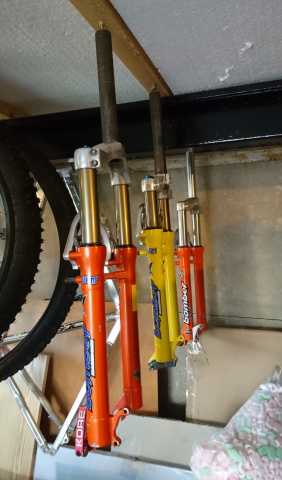
Started filling the space up again now, after a week and a half of stuff stacked on it the lawn looks a bit messy but that’s recovering well already. The bikes are stacked and hung tidy so a bit more space to play with. I ‘acquired’ some racking from work that was destined for the skip so that’s helped to stack things a bit tidier, and had a good clear out too. Turns out I have shed loads of bike parts so plenty will be finding its way to the sale threads as soon as it starts raining and I can’t be bothered going out.
I think that the big down side of this project was by emptying the garage I showed the wife just how much bike stuff I have in there, she was quite rude about that. I suppose the other problem is that it has really stalled my other projects, so I have several bikes in pieces that are not getting put together, and the other household jobs like cutting the lawns and shopping for food are getting missed.
Anyway, hard work done now, pretty chuffed with the end result.
Anyone got good plan / design for a sturdy workbench?
So our old garage was a bit tired. The roof leaked, the walls leaked, the door… well let’s just say it wasn’t watertight. It’s a sectional concrete construction almost 5m each side, my grandfather and uncle build it way back in the early 70s and it has had almost zero maintenance since. But this is the designated man cave so it needed sorting.
So in early March I ripped the doors off. That was great fun as it was a double-wide and a bit floppy, with counterweights at each side which I had to detach while holding the door up. On my own. Got that smashed and skipped with liberal application of saw and hammer. Built a wooden frame, hung some ready made doors from B&Q and filled in the leftover space with T&G planks. I painted the doors and frame before assembly so it came together really quickly, just needed lick of varnish on the T&G. Done. The boy chose the colour, he wanted me to make it look like darth maul, this was my compromise. I tried to explain that the neighbours opposite might think we were a bit odd of we put what is basically a massive devil head on the front of the building. You can make out the green tarp sheet on the roof to keep the rain off the leaky bits and some lengths of DPC down the sides to weatherproof the rotten woodwork. Very classy.
Then I have been busy with the new baby, working for a living, and waiting for some good weather so I could empty the contents of the garage onto the lawn and rip the roof off. I pencilled in some time while the kids were at school so a mate of mine could be available to help out with this one. The old asbestos corrugated sheets were 8 and 10 foot long buggers so weighed a bit. Of course we had proper RPE and all the clobber, proper job, but it turned out to be the hottest day of the year so we were in a right state by the end of that days work. Gave everything a good wash down and sweep out to get rid of all the muck and dust, 50 years of cobwebs and dropped screws. Took a wire brush to the metal frame (quite nasty rusty in places!) then another wash down and a dab of hammerite, should be good for another 40+ years now.
The roof itself was a fairly simple affair with beams front to back and OSB sheets screwed on top. I had the sheets trimmed to size by the timber merchant so it went together nice and easy, definitely a good idea! Wooden fascia to tidy up the edges and a rubber sheet stuck on top finished the job. I can really recommend the rubber sheet way. I struggled to fit it (by myself) coz its huge and heavy so definitely would have benefited from a second (or preferably fifth) pair of hands but it was much quicker and easier than sticking felt down and should last much longer too. It’s a little more expensive but not much, and hopefully will last twice as long so will work out cheaper in the long run. Also I could roll it out and cover everything over for a few days between starting and finishing the job.
Finishing touches… stripped the knackered putty from the windows and stuck in some new, sand and lick of paint on the frames and they look much better. I also decided to paint the walls. I am not a fan of the pebbledash look so glad to brighten it up. Sandtex ‘chalk hill’ was approved by the boss. And as the garage is in the garden it makes the whole place a bit nicer too. Needs a second coat at some point but it will do for now.
I have got a workbench to construct at some point and I’m leaning heavily towards a tool wall / shadow board. Longer term I need to get power down there. I have some small solar which is just about enough to keep the alarm going and occasionally run a small light, but I currently run an extension lead from the shed when I need to do anything with tools or listen to tunes while I work which is functional but not great.
Started filling the space up again now, after a week and a half of stuff stacked on it the lawn looks a bit messy but that’s recovering well already. The bikes are stacked and hung tidy so a bit more space to play with. I ‘acquired’ some racking from work that was destined for the skip so that’s helped to stack things a bit tidier, and had a good clear out too. Turns out I have shed loads of bike parts so plenty will be finding its way to the sale threads as soon as it starts raining and I can’t be bothered going out.
I think that the big down side of this project was by emptying the garage I showed the wife just how much bike stuff I have in there, she was quite rude about that. I suppose the other problem is that it has really stalled my other projects, so I have several bikes in pieces that are not getting put together, and the other household jobs like cutting the lawns and shopping for food are getting missed.
Anyway, hard work done now, pretty chuffed with the end result.
Anyone got good plan / design for a sturdy workbench?