TrevorKershaw
Retro Guru
Here is my Orange E3 retro build thread.
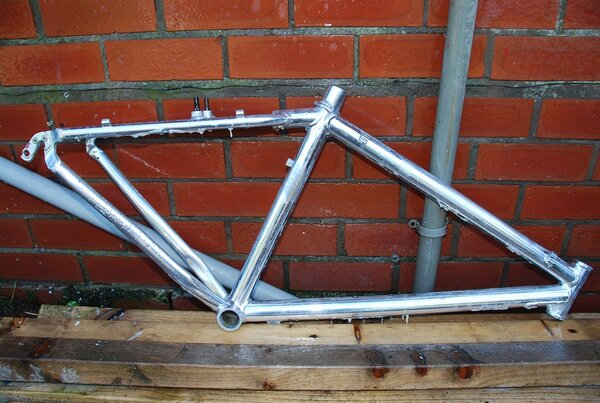
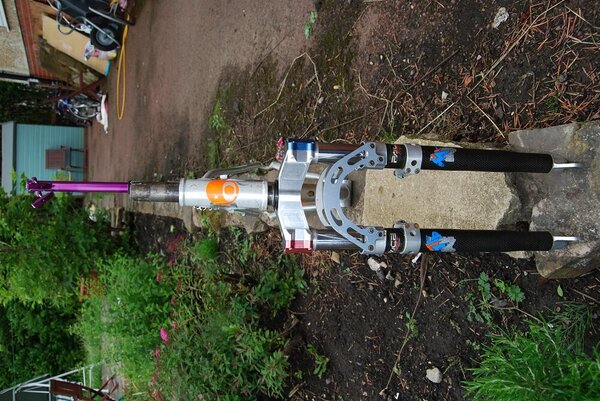
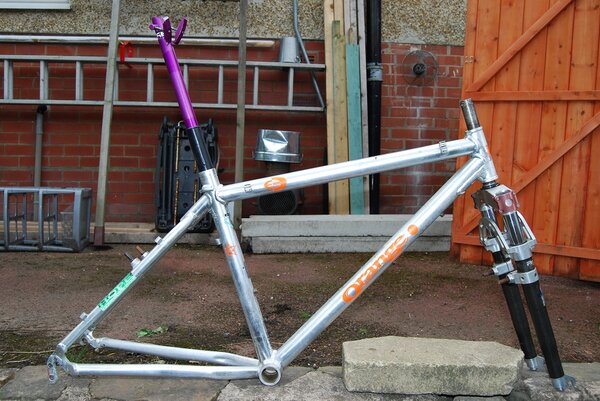
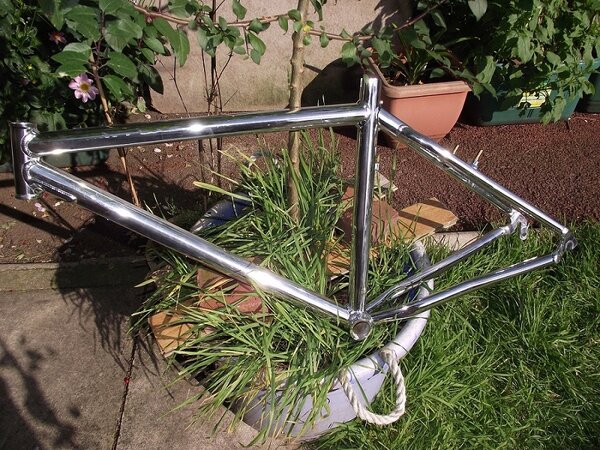
I bought the frame/forks/seat post on Ebay locally and consisted of the frame, a 1996 E3 - A0601, a pair of Pace RC35 MCXD’s and a purple USE seatpost and shim. I think the £115 I paid was reasonable. It was a buy it now sale and I’ve seen the forks alone go for £60+. See pics
The frame looked virtually white and the seatpost was missing the lower part of the clamp, so I contacted USE who couldn’t provide a purple one, so I settled for blue. I do have a thing about having blue trim on my bikes, but blue and purple, well we’ll see…
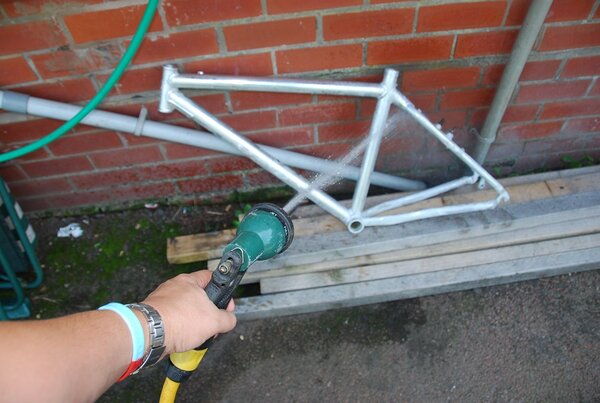
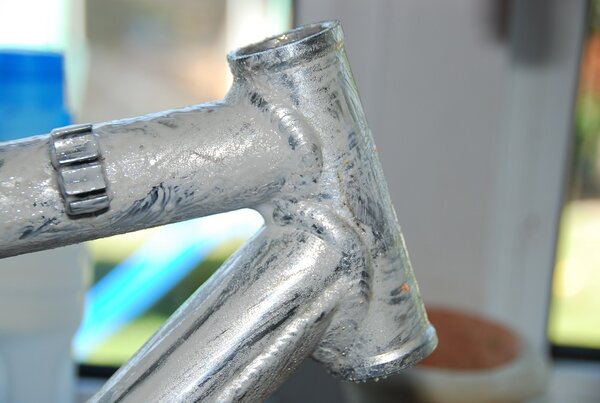
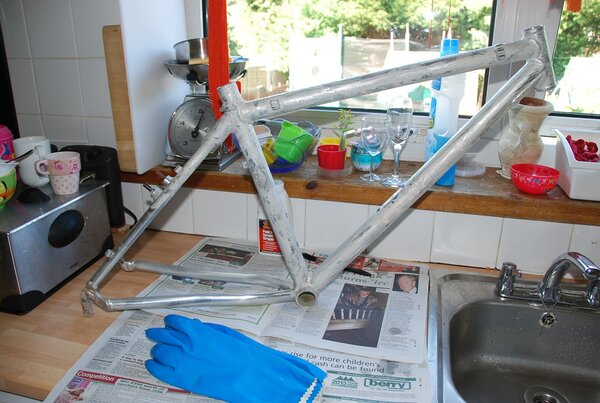
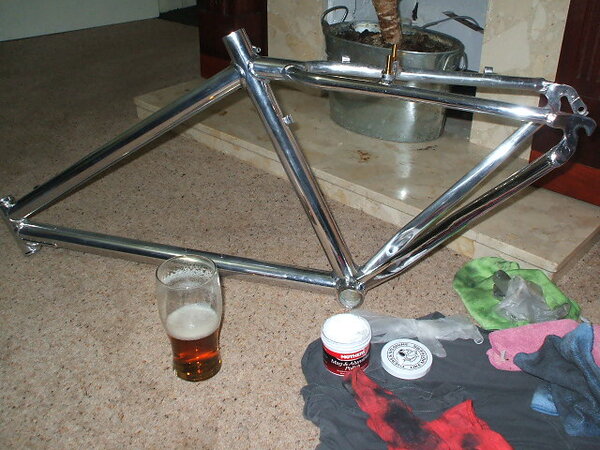
Interlude 1: Stripping the decals and lacquer and cleaned up the frame with used scotchbrite and a bit of fine steel wool where necessary.
I started collecting parts for the bike. A got a pair of X517 SUP wheels on XT hubs, an XTR bottom bracket and XT cassette, some Sachs Wavey shifters, which I have always liked and a Ritchey Scuzzy Logic headset. I also got some Ti-Ni titanium bosses for the rear brakes.
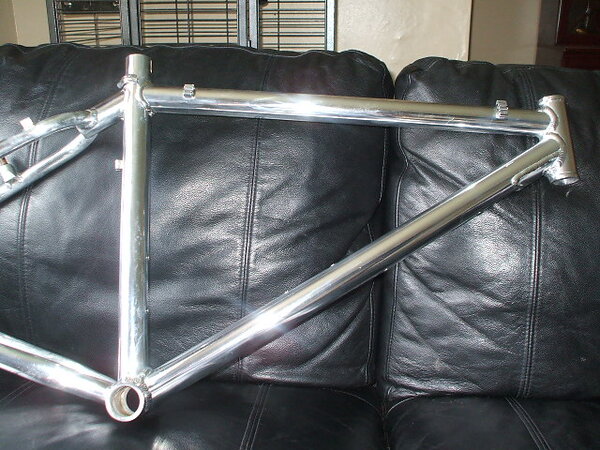
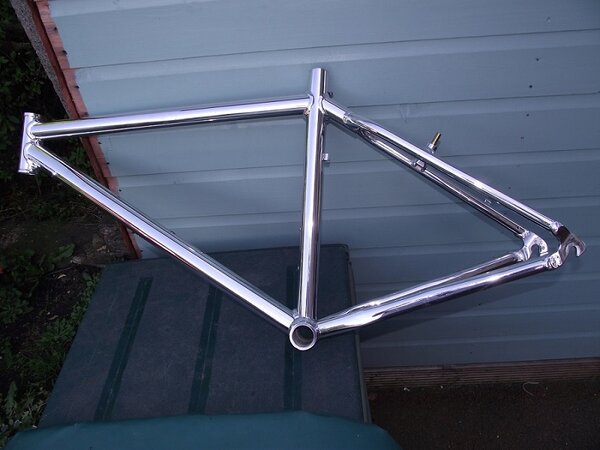
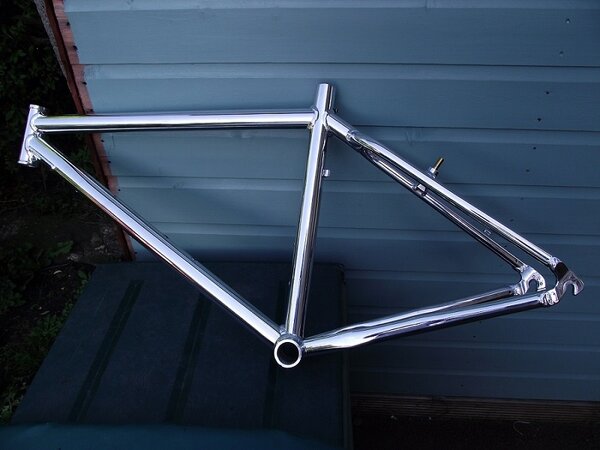
Interlude 2: Polishing the frame with Mothers Mag and Aluminum Polish.
I picked up an XT chainset complete with Pace “extruder groove” chainrings on Ebay, which are a bit worn, but still look very cool.
Interlude 3: Started polishing the chainset, but this looks like it will take some time, so I returned to polishing the bike frame. Getting cramp in my hands now…
I already have a Syncros Cattlehead stem from my P7, which will be next for an overhaul once the E3 is complete. Along with that I am going to use some Dia-Compe SS7’s that have been sitting in my parts box for 17 years or so. A Flite Transalp will sit on top of the seat post.
Interlude 4: Even more polishing of the frame. This cramp in my hands really hurts now…
I stripped the RC35’s down and used swarfega to clean out all the old grease and crud. Found a tub of Pace grease from the deal I did which got me a pair of RC36 Evo’s and found a “PUCH” metal tag inside it! Re-greased the elastomers and internal hardware. When tested they seem to be okay and will be fine until I can get a Judy springs upgrade. But one thing at a time…
Interlude 5: Even more polishing of the frame. This cramp in my hands doesn’t seem to hurt as much now…
THE BIG DECISION: Do I lacquer the frame or not?
I think I will choose to lacquer it, as I don’t really want to keep having to polish it after a ride. Having 2 children under the age of 7, I don’t really have that much spare time and feel it will be difficult to maintain a highly polished finish.
Interlude 6: Even more polishing of the frame. It’s looking quite good now. Funny thing, I don’t have cramp in my hands anymore. I paid the window cleaner and shook his hand today. He had an anguished look on his face and tears came to his eyes. I wonder what he’d been eating…
Pics of bike when bought:
I bought the frame/forks/seat post on Ebay locally and consisted of the frame, a 1996 E3 - A0601, a pair of Pace RC35 MCXD’s and a purple USE seatpost and shim. I think the £115 I paid was reasonable. It was a buy it now sale and I’ve seen the forks alone go for £60+. See pics
The frame looked virtually white and the seatpost was missing the lower part of the clamp, so I contacted USE who couldn’t provide a purple one, so I settled for blue. I do have a thing about having blue trim on my bikes, but blue and purple, well we’ll see…
Interlude 1: Stripping the decals and lacquer and cleaned up the frame with used scotchbrite and a bit of fine steel wool where necessary.
I started collecting parts for the bike. A got a pair of X517 SUP wheels on XT hubs, an XTR bottom bracket and XT cassette, some Sachs Wavey shifters, which I have always liked and a Ritchey Scuzzy Logic headset. I also got some Ti-Ni titanium bosses for the rear brakes.
Interlude 2: Polishing the frame with Mothers Mag and Aluminum Polish.
I picked up an XT chainset complete with Pace “extruder groove” chainrings on Ebay, which are a bit worn, but still look very cool.
Interlude 3: Started polishing the chainset, but this looks like it will take some time, so I returned to polishing the bike frame. Getting cramp in my hands now…
I already have a Syncros Cattlehead stem from my P7, which will be next for an overhaul once the E3 is complete. Along with that I am going to use some Dia-Compe SS7’s that have been sitting in my parts box for 17 years or so. A Flite Transalp will sit on top of the seat post.
Interlude 4: Even more polishing of the frame. This cramp in my hands really hurts now…
I stripped the RC35’s down and used swarfega to clean out all the old grease and crud. Found a tub of Pace grease from the deal I did which got me a pair of RC36 Evo’s and found a “PUCH” metal tag inside it! Re-greased the elastomers and internal hardware. When tested they seem to be okay and will be fine until I can get a Judy springs upgrade. But one thing at a time…
Interlude 5: Even more polishing of the frame. This cramp in my hands doesn’t seem to hurt as much now…
THE BIG DECISION: Do I lacquer the frame or not?
I think I will choose to lacquer it, as I don’t really want to keep having to polish it after a ride. Having 2 children under the age of 7, I don’t really have that much spare time and feel it will be difficult to maintain a highly polished finish.
Interlude 6: Even more polishing of the frame. It’s looking quite good now. Funny thing, I don’t have cramp in my hands anymore. I paid the window cleaner and shook his hand today. He had an anguished look on his face and tears came to his eyes. I wonder what he’d been eating…
Pics of bike when bought: