Completed May 2021
Setting The Scene: Its fair to say I'm a huge Pace fan taking inspiration from Jerky, Gil M ,Rich Matthews, Bollox64 as well as many others
Through the years I've seen some epic Pace builds. DR s (pretty sure he sprayed his RC100 six times until he was happy with the colour) , Neil Millard's, Rich's Pink Pace (Mavic Groupset) and the perfection that Bollox64 goes to with his builds. I can't write about amazing Paces and not mention Bibbsey's original RC100 with a Campy groupset which is outstanding
In the late 90's a friend turned up on a Red F7 to go for a bike ride and id honestly never seen anything as stunning. I made him give me first refusal and when he later wanted to buy an Orange I jumped at the chance of owning it.
At the time of buying my F7 I genuinely wasn't aware that there were 6 previous iterations of this model, let alone that the RC100 existed. I made obtaining a RC100 and then an RC300 a goal and thanks to Jerky and the Caramba kid I got one of each. Since then I've added a stunning F1 finished in Champagne from Bollox64 and an F2 to my collection
I have previously mentioned there being 4 Pace's around that I would love to add to my collection, but that in reality I only stood a slim chance of buying one of them .
The Bike:
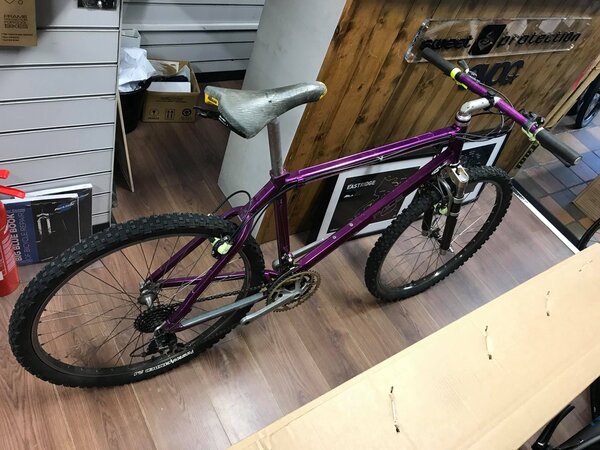
After a few ups and downs but definitely finishing on an up I've managed to buy Richard Thackray’s iconic ex team Pace F1 from around the 92 era (It definitely was the era of Purple or 3DV) . Although this bike was one of the four id love to own, I didn't think I stood a chance of buying it
The bad news however is that its been ridden over the years. Not normally a bad point but regrettably its been ridden to a point where damage has occurred. Its my aim with the help of some very talented people to restore this to as original a condition as I can. Thanks to Adam Bentham and Rich Matthews I have an idea of how the bike looked in its heyday and the component spec and what I aspire to return it to
For me its about keeping this as original as possible and showcasing the work of the talented people who without their help it would not be possible to see this return to becoming a rider.
This actually featured on an episode of the GMBN tech show. If interested follow the link at its at 7mins in (Thanks John Paddock aka Spud):
The talented people I will be engaging will hopefully add to this thread to showcase their specialisms as they undertake the work. This thread may go quiet given the current climate but will be added to as and when I can
The first order of business is to get it stripped down. The frame will be going off to the Leg End that is Dan Chambers, the Forks to Tim at Fork English. GIL M is kindly going to build the wheels and Retrodecals are working on producing a set of decals to match the bike in its sponsored race livery
I do need the following parts to help with this special build:
1) Rear 32H Pace Alloy Hub
2) Early Renthal (Shimmed Bars) sorted
3) M735 Shortcage Rear Mech (must be v.good + condition)
4) Silver or Purple X-Lite Crank Caps
5) X-Lite Cam Lock Seatpost Pin
6) Purple American Classic Bottle Cage (Fingers crossed that is in hand) Now sorted
Thanks already to SI33 for the pedals, its really appreciated and I will hopefully be receiving some special parts to make this build truly authentic. More on that as it happens
Pics:
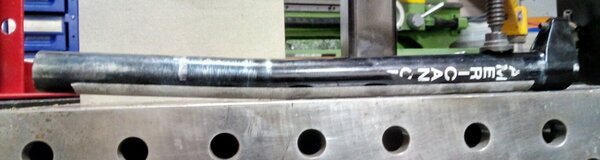
Pic 1 - Damage to downtube
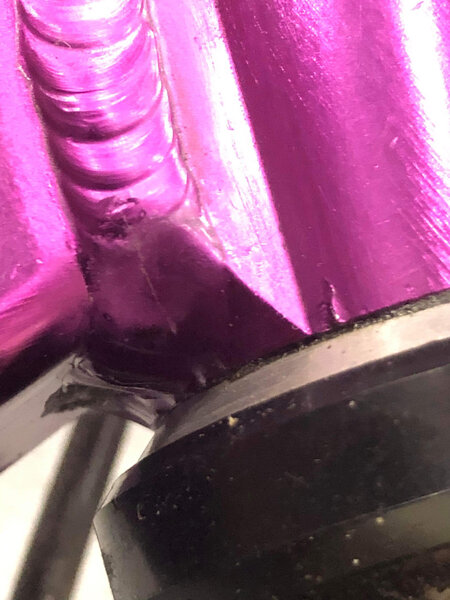
Pic 2 - Crack to Headtube Weld
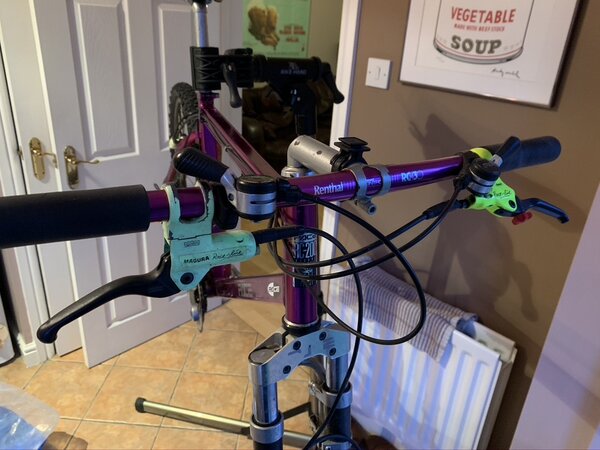
Pic 3 - Miss-matched brake levers
Pic 4- In my kitchen strip down commenced
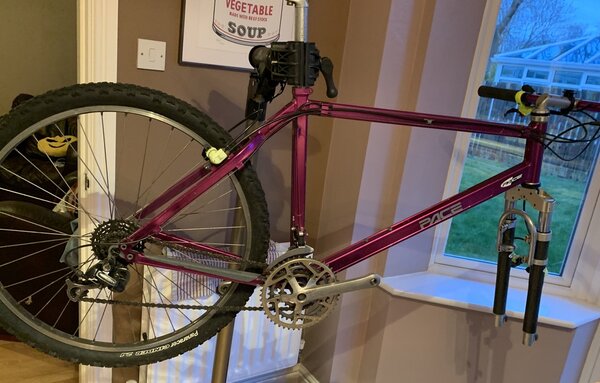
Pic 5 - Ready for collection
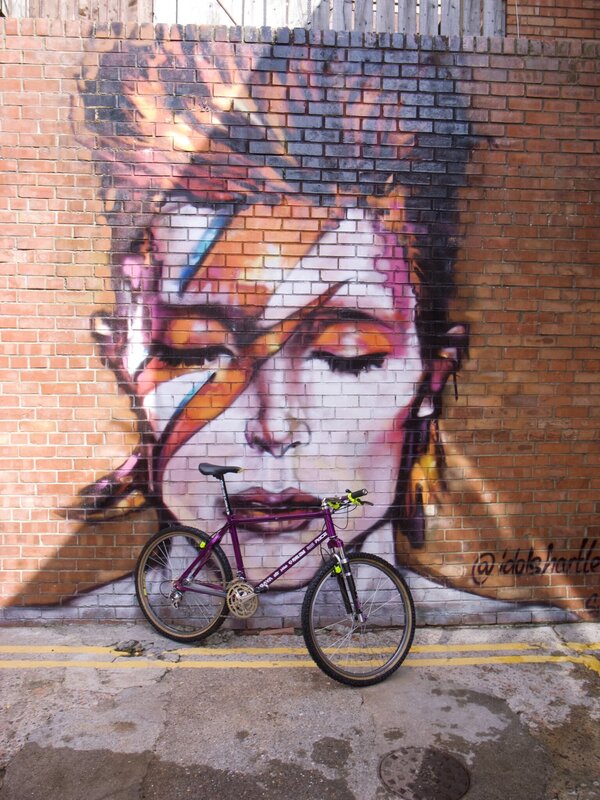
Pic 6 - Parked up looking good
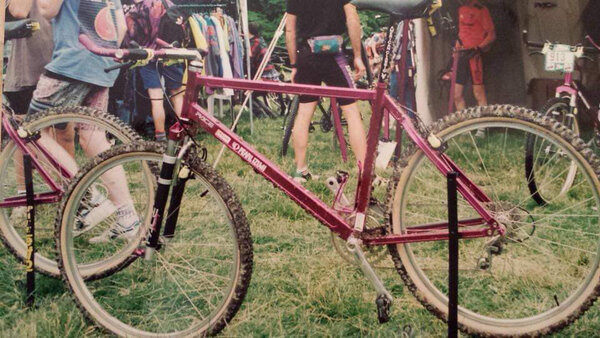
Pic 7 - The Bike in its heyday being ridden by Rich
Attachments
-
 Richard Riding Pace.jpeg160.5 KB · Views: 3,255
 -
 Parked Up Pace.jpeg104.5 KB · Views: 3,240
 -
 Ready For Collection.jpeg148.1 KB · Views: 3,211
 -
 Kitchen Stripdown.jpeg130.1 KB · Views: 3,207
 -
 Miss Matched Levers.jpeg106.3 KB · Views: 3,224
 -
 Head Tube Crack In Weld.jpeg102.2 KB · Views: 3,221
 -
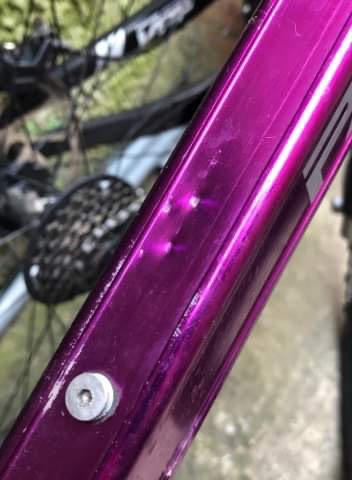 Down Tube Damage.jpeg25 KB · Views: 3,218
 -
 R0012403-1.jpg583.2 KB · Views: 297
Last edited by a moderator: