scooter
Retro Guru
Hi again ,
Ive had a few people ask me how I made the wooden mudguards on my Rotrax so i thought id share the process. I never took many photos during making them but here goes -
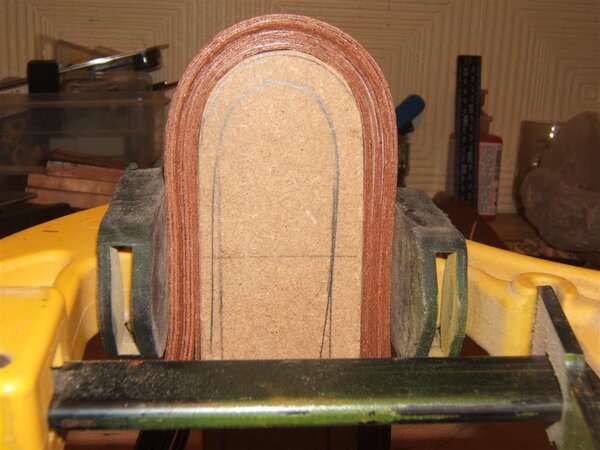
So firstly if i start with the mould.
Here-


This is made from a sheet of 3/4" sterling board (cheap ply) and Its two layers glued and screwed together which gives 1 1/2" (40mm ish) thickness, enough for the width of the mudguard.
I used a glue called d4 on this mould, although anything will do like Pva, or gorilla glue etc, and also screws to pull it up tight.
So depending on your wheel size? mine are 27" , I measured the diameter of the wheel including the tyre inflated and added on about 10-15 mm, enough for the mudguard to be clear of the tyre when mounted.
Then glue and screw both pieces of board together (oversize)
Then using a string, a nail and a marker pen, mark out the circle on the sterling board (to the diameter of your tyre including the 10-15mm clearance)
The diameter of my mould is 705mm.
Then cut out the circle using a jigsaw, and finish off with a belt sander to a smoother & neater finish.
Once the glue is dry you can remove all screws , this allows you cut out the middle sections as shown so you can handle the mould easier and they are lighter to work with.
Now the Mudguards-
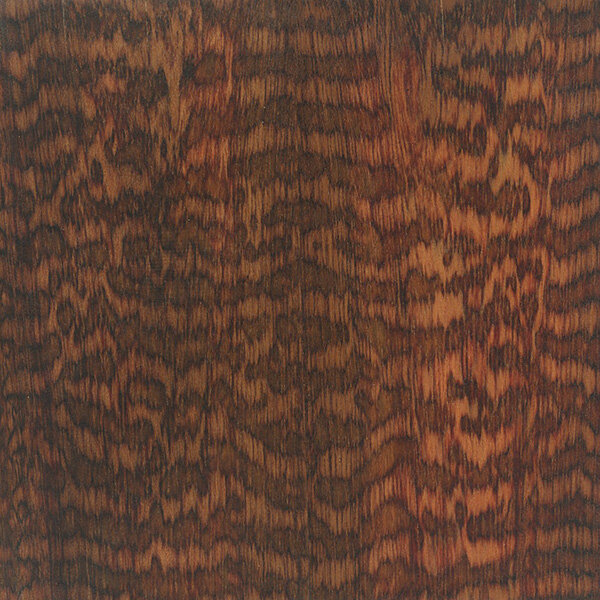
I used Mahogany & oak -


The mahogany i used is from and old window cill that i had in the garage, i used my circular saw to rip thin strips off then reduced them further with the belt sander.
The oak is from the top layer of engineered oak flooring left over from a job i was doing. I managed to prize off the top layer (i did soak them for a day or so which helped) then cut and sanded again in to strips.
For full wrap mudguards you need the lengths to be -
Front 700mm & rear 1200mm
The thickness of the strips i ended up with were about 2mm or just over( just enough to get the bend on without them breaking)
And they were about 40mm wide
To achieve the stripe finish which i chose. i had to cut one of each strip (mahogany and oak) into narrower strips then place one between the other two for the top layer section of the mudguard , but its probably easier just to make plain ones -

The thickness of this cut section measures 7mm thick & 35mm wide.
So once you have strips ready they are good for glueing around the mould.
3 strips per mud guard
I used normal pva wood glue, cheap and very strong.
Lay the strips on a flat surface & use a paint brush to apply the glue evenly all over with no gaps or debris.
First strip which is the bottom layer, apply to the top side only (don't want to stick to the mould) ,
,
Second strip - the middle layer, apply to both sides and place on top of the bottom strip (glue to glue). Then the top strip, again one side only and place on top of the middle one (glue side down).
Then push down on them and give them a slight side to side movement to get the glue evenly spread & compressed, clean of excess glue with damp cloth.
Stand the mould up vertically & lay the mudguard onto it, starting from the middle use tape (i used electrical tape) and tape it nice and tightly around the mould every 4 inches or so, working your way along to the end & then back to the other end (that's where the cut out sections on the mould come in handy).
They should pull the strips down nice and tightly to the mould , you can fit both mudguards around the mould so may aswell do both at the same time.
Then wipe off all excess glue again. Then as a final securing device , i used a ratchet strap and placed around the whole mould and pulled it tightly.
I left mine for about one week as I was busy, but i think a couple of days would be just fine.
Once the glue is dry you can remove the strap and tape and then begin shaping.


I used my belt sander to get the slight curve on the top of mine,
Using electrical tape again i secured the strip onto the mould and worked in small sections as its hard to run the sander right round the mould due to the tape.
I secured the mould upright to the side of a bench at standing height to make it easier for working with.
Once i had a fairly good shape i just sanded by hand going up the grades to a finer finish until you are happy.
The finish on mine is just normal clear wood varnish , 2-3 coats.
And that's about it for the woodwork side,
Then its making the brackets, I used 22mm copper pipe rolled out and polished, then shaped using tin snips and bent in the vice & edges filed smooth.


The rivets i used are 5mm flat headed copper. At first i tried to use a rivet punch but i found that i could not get the dome shape as the rivet shank just kept bending and there was a risk of splitting the wood so instead i resorted to using a ball pein hammer to flatten it off which worked a whole lot better & i left about 3-4mm protruding to do this.
Quick refresh in some dimensions-
Strips before shaping= 2mm thickness 40-45 mm wide
Front length 700mm (best to over length, say 750mm)
Rear 1200mm (same again 1250mm)
After shaping = width 35mm
Mould diameter = 705mm , thickness 1 1/2" (40mm ish).
And now mounted on the bike-


Thanks for looking and good luck if you give it go
viewtopic.php?f=23&t=298692
viewtopic.php?f=12&t=298673
Ive had a few people ask me how I made the wooden mudguards on my Rotrax so i thought id share the process. I never took many photos during making them but here goes -
So firstly if i start with the mould.
Here-


This is made from a sheet of 3/4" sterling board (cheap ply) and Its two layers glued and screwed together which gives 1 1/2" (40mm ish) thickness, enough for the width of the mudguard.
I used a glue called d4 on this mould, although anything will do like Pva, or gorilla glue etc, and also screws to pull it up tight.
So depending on your wheel size? mine are 27" , I measured the diameter of the wheel including the tyre inflated and added on about 10-15 mm, enough for the mudguard to be clear of the tyre when mounted.
Then glue and screw both pieces of board together (oversize)
Then using a string, a nail and a marker pen, mark out the circle on the sterling board (to the diameter of your tyre including the 10-15mm clearance)
The diameter of my mould is 705mm.
Then cut out the circle using a jigsaw, and finish off with a belt sander to a smoother & neater finish.
Once the glue is dry you can remove all screws , this allows you cut out the middle sections as shown so you can handle the mould easier and they are lighter to work with.
Now the Mudguards-
I used Mahogany & oak -


The mahogany i used is from and old window cill that i had in the garage, i used my circular saw to rip thin strips off then reduced them further with the belt sander.
The oak is from the top layer of engineered oak flooring left over from a job i was doing. I managed to prize off the top layer (i did soak them for a day or so which helped) then cut and sanded again in to strips.
For full wrap mudguards you need the lengths to be -
Front 700mm & rear 1200mm
The thickness of the strips i ended up with were about 2mm or just over( just enough to get the bend on without them breaking)
And they were about 40mm wide
To achieve the stripe finish which i chose. i had to cut one of each strip (mahogany and oak) into narrower strips then place one between the other two for the top layer section of the mudguard , but its probably easier just to make plain ones -

The thickness of this cut section measures 7mm thick & 35mm wide.
So once you have strips ready they are good for glueing around the mould.
3 strips per mud guard
I used normal pva wood glue, cheap and very strong.
Lay the strips on a flat surface & use a paint brush to apply the glue evenly all over with no gaps or debris.
First strip which is the bottom layer, apply to the top side only (don't want to stick to the mould)
, Second strip - the middle layer, apply to both sides and place on top of the bottom strip (glue to glue). Then the top strip, again one side only and place on top of the middle one (glue side down).
Then push down on them and give them a slight side to side movement to get the glue evenly spread & compressed, clean of excess glue with damp cloth.
Stand the mould up vertically & lay the mudguard onto it, starting from the middle use tape (i used electrical tape) and tape it nice and tightly around the mould every 4 inches or so, working your way along to the end & then back to the other end (that's where the cut out sections on the mould come in handy).
They should pull the strips down nice and tightly to the mould , you can fit both mudguards around the mould so may aswell do both at the same time.
Then wipe off all excess glue again. Then as a final securing device , i used a ratchet strap and placed around the whole mould and pulled it tightly.
I left mine for about one week as I was busy, but i think a couple of days would be just fine.
Once the glue is dry you can remove the strap and tape and then begin shaping.


I used my belt sander to get the slight curve on the top of mine,
Using electrical tape again i secured the strip onto the mould and worked in small sections as its hard to run the sander right round the mould due to the tape.
I secured the mould upright to the side of a bench at standing height to make it easier for working with.
Once i had a fairly good shape i just sanded by hand going up the grades to a finer finish until you are happy.
The finish on mine is just normal clear wood varnish , 2-3 coats.
And that's about it for the woodwork side,
Then its making the brackets, I used 22mm copper pipe rolled out and polished, then shaped using tin snips and bent in the vice & edges filed smooth.


The rivets i used are 5mm flat headed copper. At first i tried to use a rivet punch but i found that i could not get the dome shape as the rivet shank just kept bending and there was a risk of splitting the wood so instead i resorted to using a ball pein hammer to flatten it off which worked a whole lot better & i left about 3-4mm protruding to do this.
Quick refresh in some dimensions-
Strips before shaping= 2mm thickness 40-45 mm wide
Front length 700mm (best to over length, say 750mm)
Rear 1200mm (same again 1250mm)
After shaping = width 35mm
Mould diameter = 705mm , thickness 1 1/2" (40mm ish).
And now mounted on the bike-


Thanks for looking and good luck if you give it go
viewtopic.php?f=23&t=298692
viewtopic.php?f=12&t=298673