Skynet
Senior Retro Guru
I'm not sure anyone will be interested and people with vector apps probably know how to do this anyway. But just incase anyone is interested...
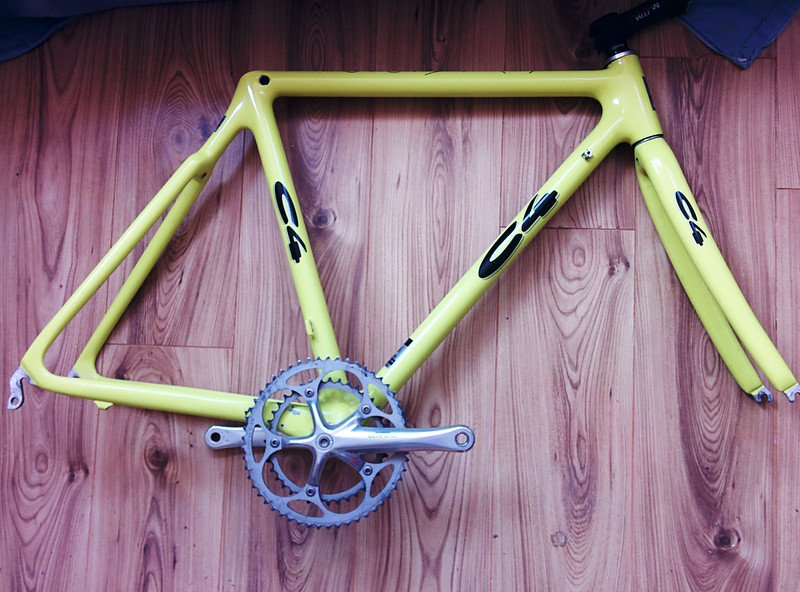
My brother's just starting to get in to bike painting, he's done cars and stuff before but wanted to try something different. Anyway we've decided to use my old C4 as one of the project frames and were thinking about designs. This is just to show a nicer way of mocking up paint schemes using a vector app, although something like photoshop would work too. For this I used Affinity Designer but they all work the same way for this.
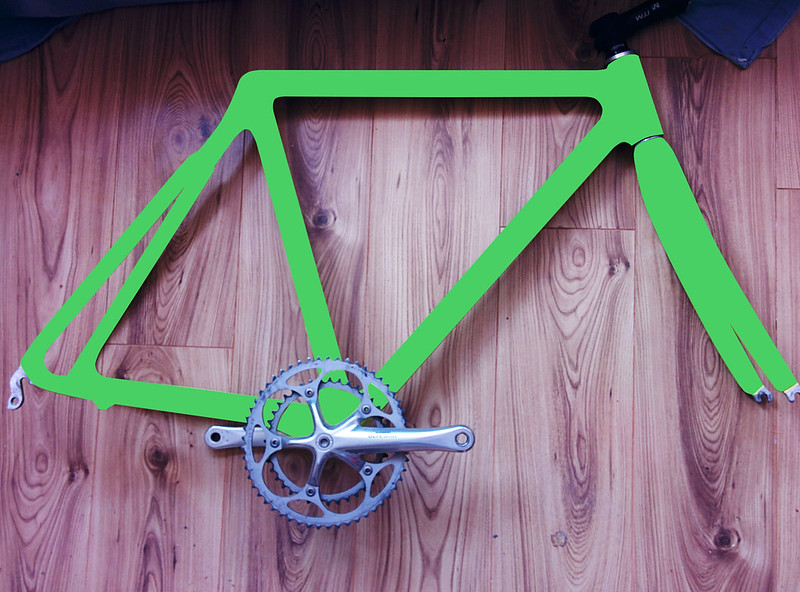
Often you'll just create a flat coloured idea of how it would look, something like this
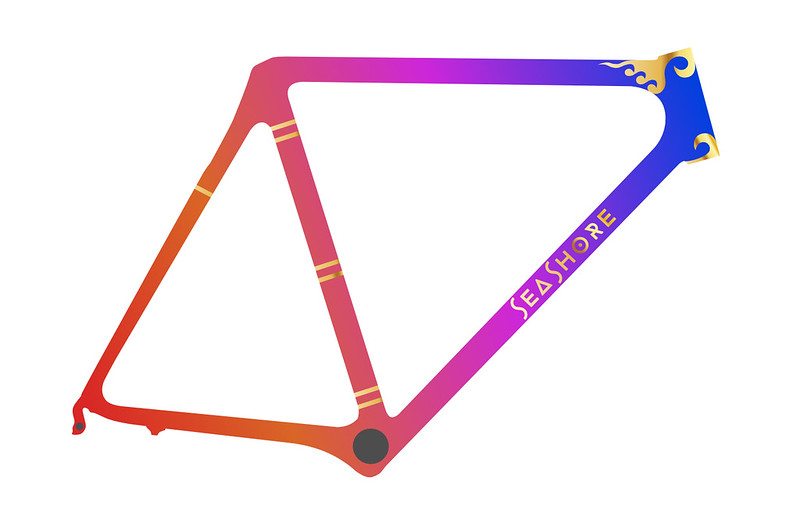
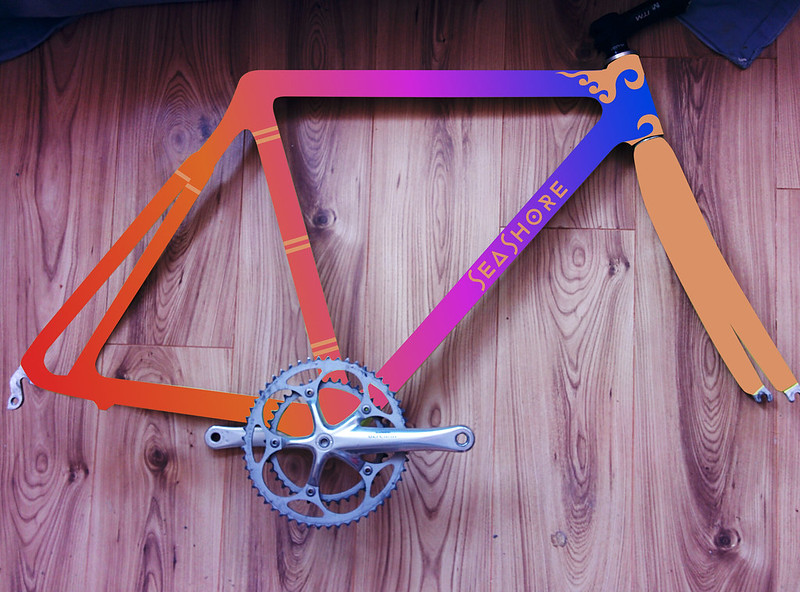
Which is fine but it's nice to see a more realistic view.
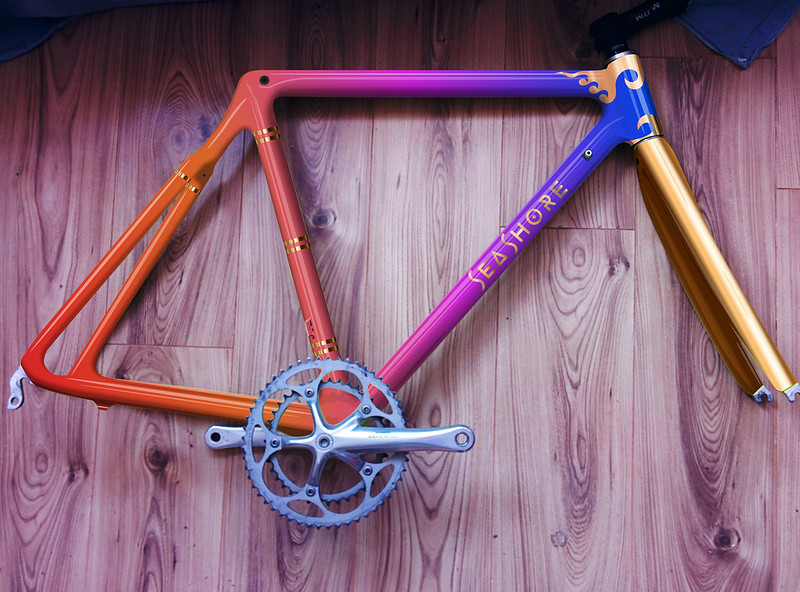
Next step to follow...
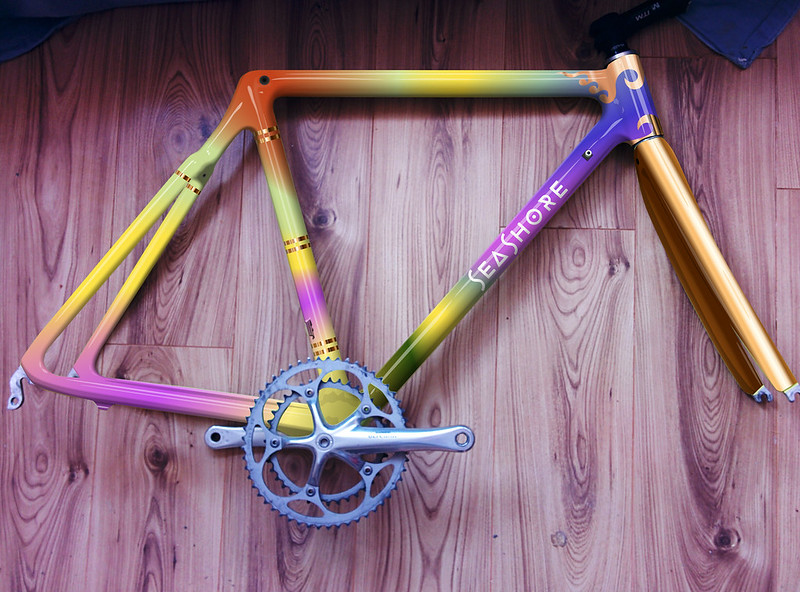
My brother's just starting to get in to bike painting, he's done cars and stuff before but wanted to try something different. Anyway we've decided to use my old C4 as one of the project frames and were thinking about designs. This is just to show a nicer way of mocking up paint schemes using a vector app, although something like photoshop would work too. For this I used Affinity Designer but they all work the same way for this.
Often you'll just create a flat coloured idea of how it would look, something like this
Which is fine but it's nice to see a more realistic view.
Next step to follow...