It's been a while since I've hung out on retrobike but I just bought some slightly knackered but lovely RSRs and more recently a 94 Explosif frame. I only planned to get my 98 Explosif up and running so my girlfriend could ride trails around the New Forest and hopefully the South Downs but I'm sure you know how these things go…
I've also managed to break arm pretty well a couple of weeks ago which means I've had way too much time on my hands. You'll need to bear with me, I need to take strong pain killers to cope with the pain so I might be a bit confusing. Feel free to call me on anything!
Anyway, there seems to be a lack of info on CBR dog bones so hopefully I'll collate some of the info I've been struggling to find.
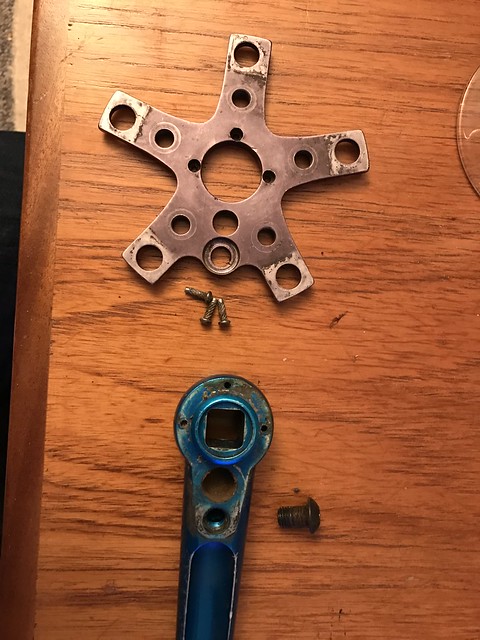
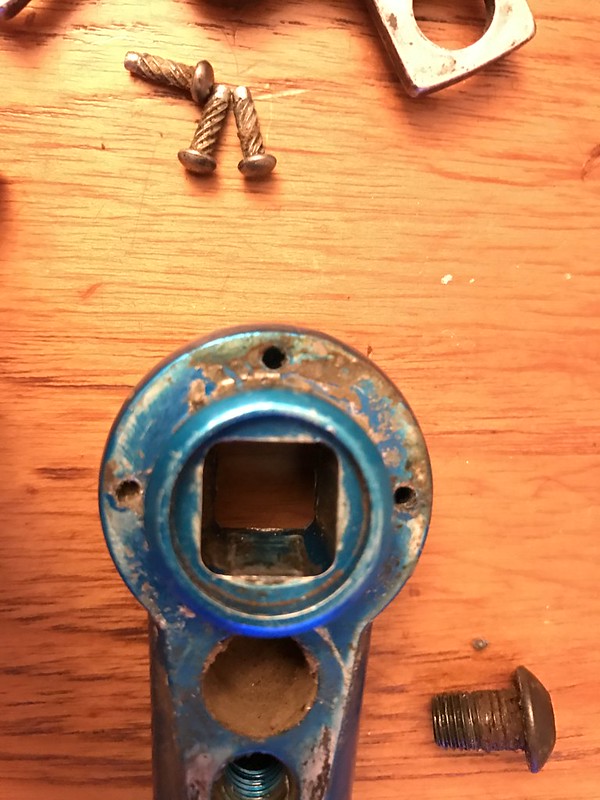
First of all, taking them apart; I read the usual "it's impossible, you'll die" rubbish on several forums. I was lucky because two of the pins on the back of the spider were already working their way to freedom. I managed to pry them out quite easily. The third's head was below the edge of the spider so I just undid the bolt and hit it with a (nylon) hammer. While the bolt seemed a bit rounded no Allen keys I had seemed to fit but an imperial key worked well enough to undo it. It looks standard so I'll source a new one that's 5 or 6 mill. Even with a broken arm it was easy.
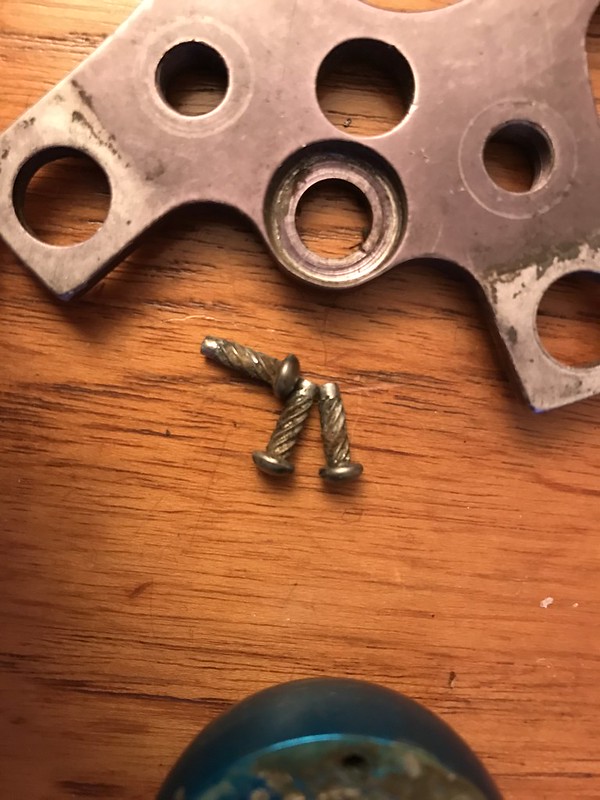
The pins have a helix on them but they don't seem reluctant to come out. Once it was all apart it seems the spider and pins were glued together. The glue (if it is glue), which is now dark beige, peels off easily. I guess it's an epoxy, I've seen this kind of stuff on old aircraft parts but I could easily be wrong though. If it was glued together then the glue has long given up its purpose.
Hopefully this works, I remember having a hell of a time posting pictures here. Don't worry though, you won't have to see that yawning f*****g kitten!

Next step is getting them reannodised. I'll sand the worst out but leave the big divots in. Hopefully polishing them as much as I can will reduce the cost of annodising. There's a few big dents that I can't get rid of so I'll live with those. I need to check how the stripping will affect the tapers and threads and then get the logo laser etched again. I think these will be the biggest obstacle.
I've also managed to break arm pretty well a couple of weeks ago which means I've had way too much time on my hands. You'll need to bear with me, I need to take strong pain killers to cope with the pain so I might be a bit confusing. Feel free to call me on anything!
Anyway, there seems to be a lack of info on CBR dog bones so hopefully I'll collate some of the info I've been struggling to find.
First of all, taking them apart; I read the usual "it's impossible, you'll die" rubbish on several forums. I was lucky because two of the pins on the back of the spider were already working their way to freedom. I managed to pry them out quite easily. The third's head was below the edge of the spider so I just undid the bolt and hit it with a (nylon) hammer. While the bolt seemed a bit rounded no Allen keys I had seemed to fit but an imperial key worked well enough to undo it. It looks standard so I'll source a new one that's 5 or 6 mill. Even with a broken arm it was easy.
The pins have a helix on them but they don't seem reluctant to come out. Once it was all apart it seems the spider and pins were glued together. The glue (if it is glue), which is now dark beige, peels off easily. I guess it's an epoxy, I've seen this kind of stuff on old aircraft parts but I could easily be wrong though. If it was glued together then the glue has long given up its purpose.
Hopefully this works, I remember having a hell of a time posting pictures here. Don't worry though, you won't have to see that yawning f*****g kitten!
Next step is getting them reannodised. I'll sand the worst out but leave the big divots in. Hopefully polishing them as much as I can will reduce the cost of annodising. There's a few big dents that I can't get rid of so I'll live with those. I need to check how the stripping will affect the tapers and threads and then get the logo laser etched again. I think these will be the biggest obstacle.
")