Hey there everyone.. thought i would share a recent project i have been working on. I picked up a few manitou forks about a year or so ago and have been playing around with various configurations regarding internals. I built up a manitou 2 to factory specs just to start with in order to see what the original ride characteristics should be like with a rider of my size. Riding the factory setup (elastomer stack only), i was generally pleased with the ride but experienced much fluctuation in handling characteristics when the cold weather rolled around. Cold and stiff polyurethane proved to be rather useless during the later winter/early spring time, rendering my fork more or less fully rigid at times. My biggest gripe with the factory setup was that low speed compression was virtually non existent. The fork seemed to work well with medium to big hits, but showed very little give on the fire trails. I first started thinking about a spring/coil setup when i came across some photos on google of someone installing a coil/rubber combo for street riding. I was fond of the simplicity and the supposed efficacy of such a crude stack and embarked on my own path to try and emulate something similar, but perhaps with more modularity. Here are some photos of the setup that i just finished installing. This is an initial run that i suppose will require some tweaking here and there but the basic concept is simple. Following will be some photos and a basic breakdown of componentry.
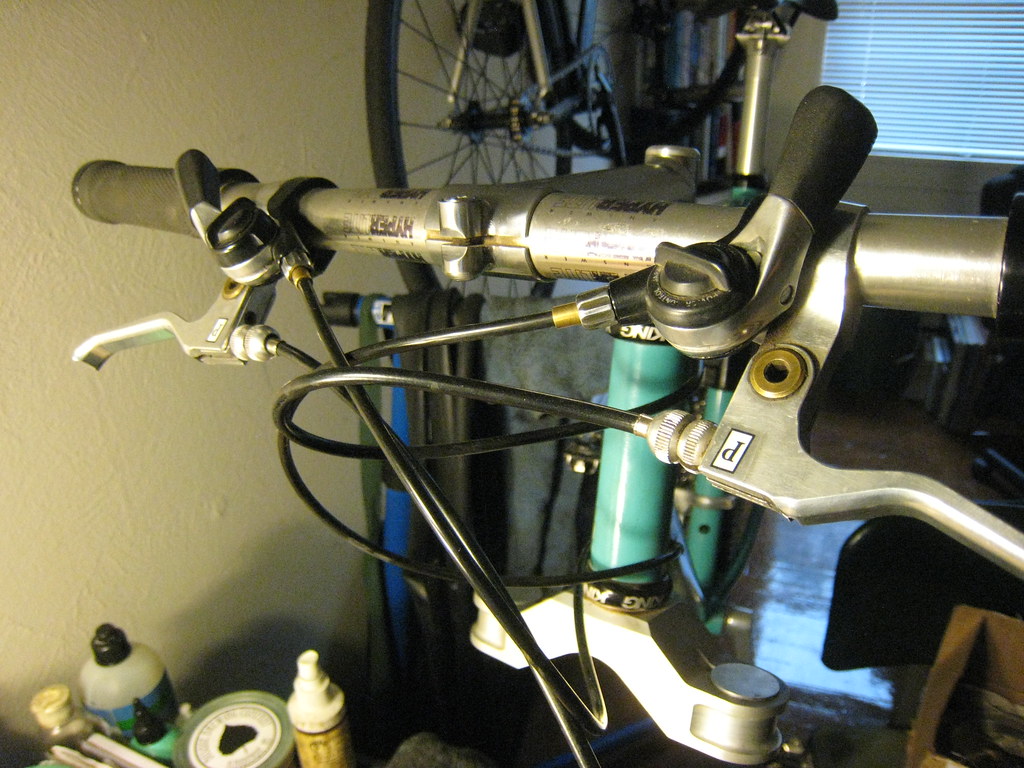
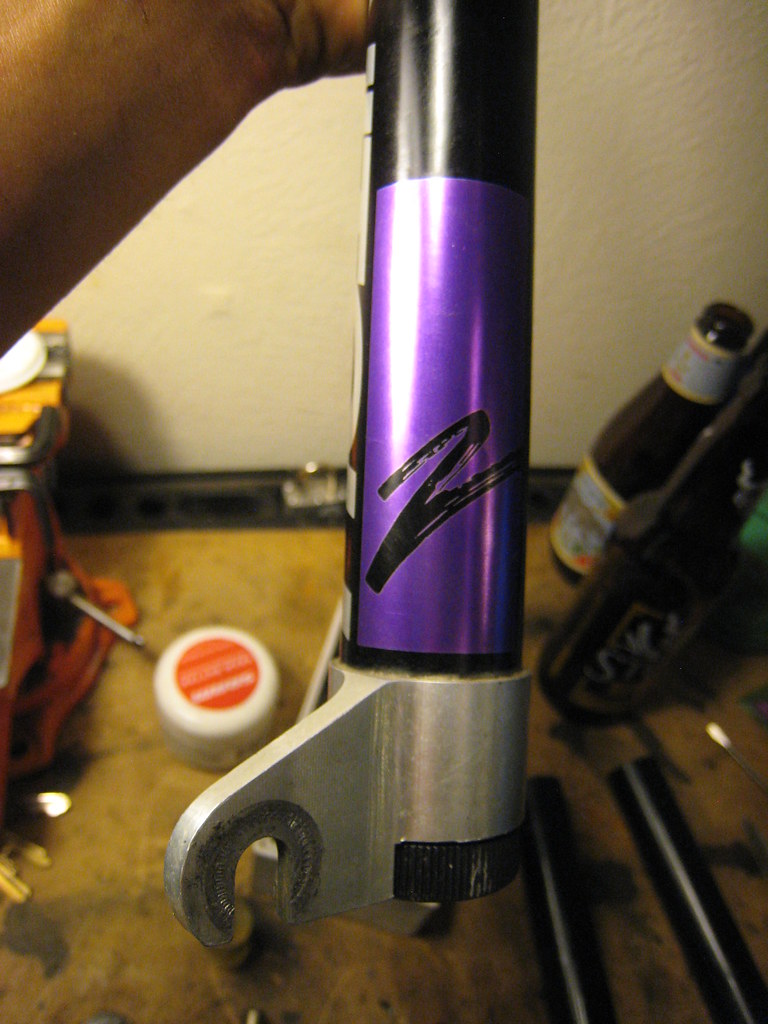
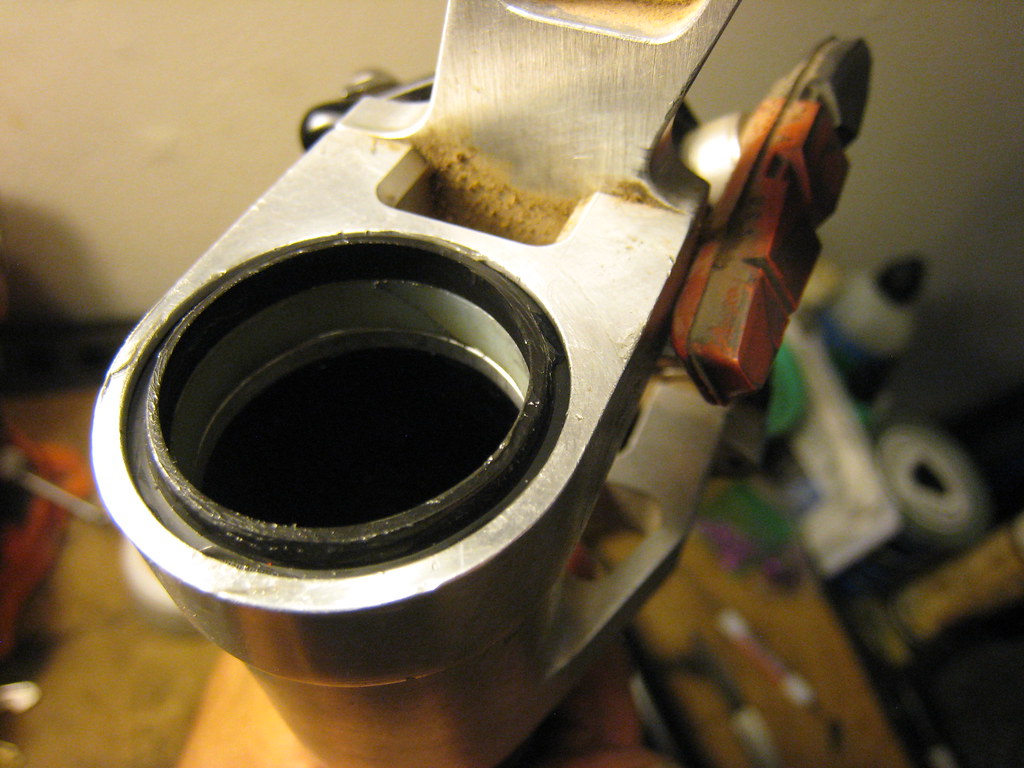
Here is the front end with the stanchions and lowers removed completely from the fork. I went with the manitou 4/eft crown because they have some nicely machined flat spots right below the top of the crown. This allows you seat the stanchions right to the top with confidence and no guess work.
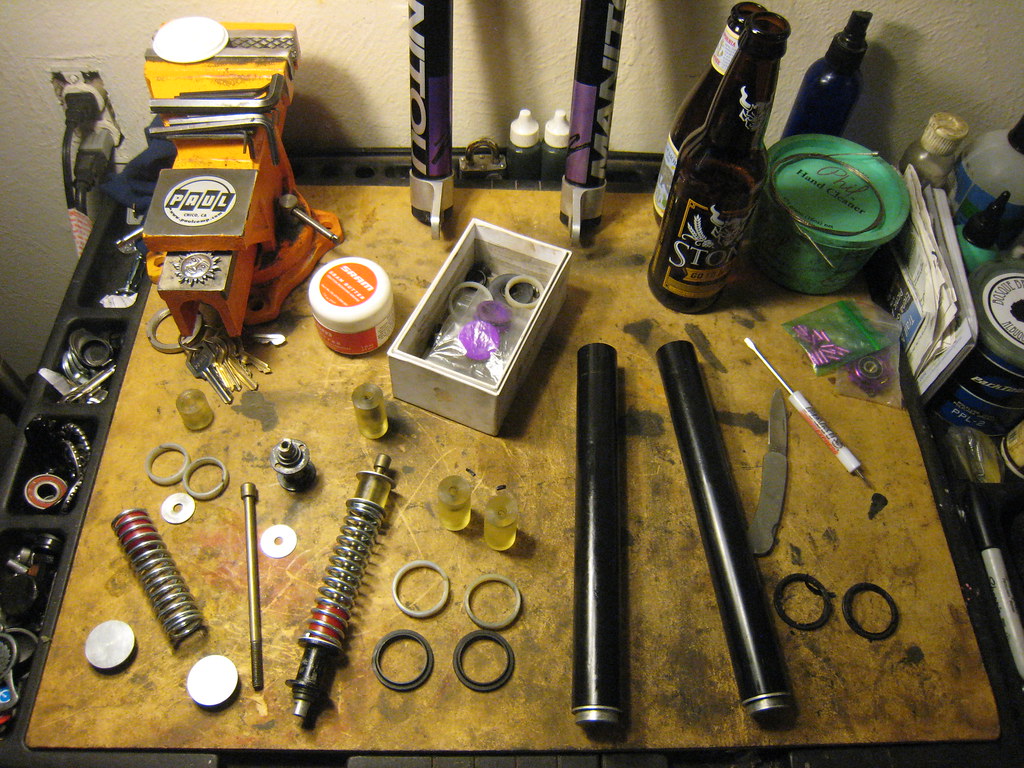
Here are the essentials spread out and ready for setup.
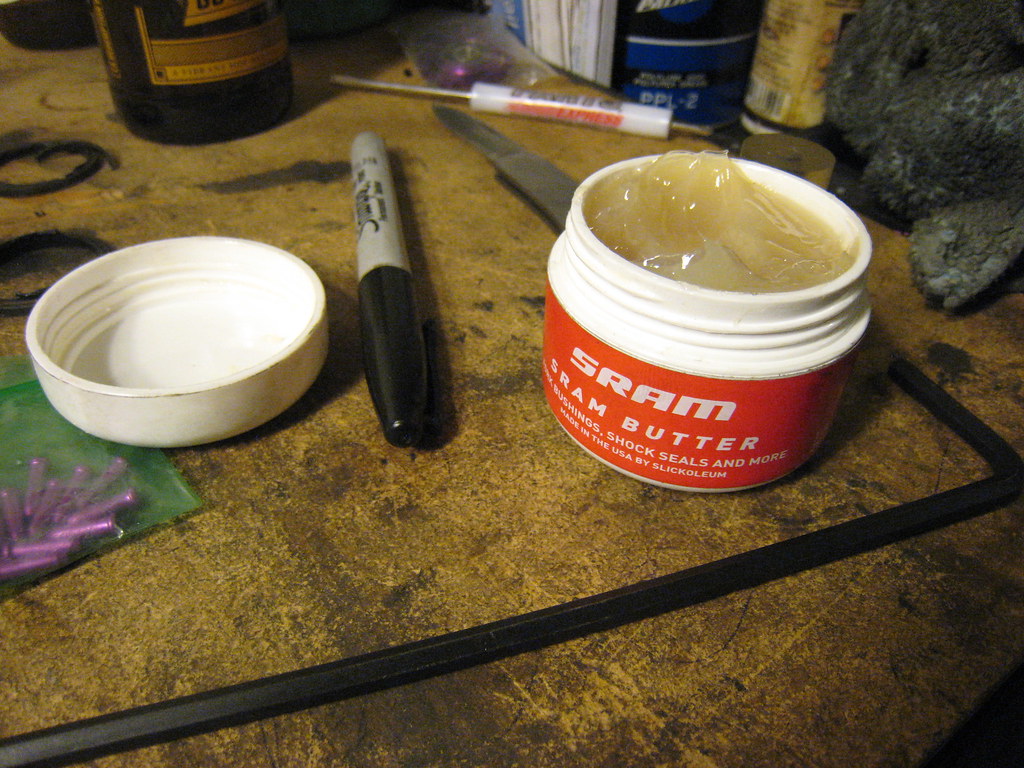
Using Sram butter for this one.. non lithium grease is an elastomer's best friend
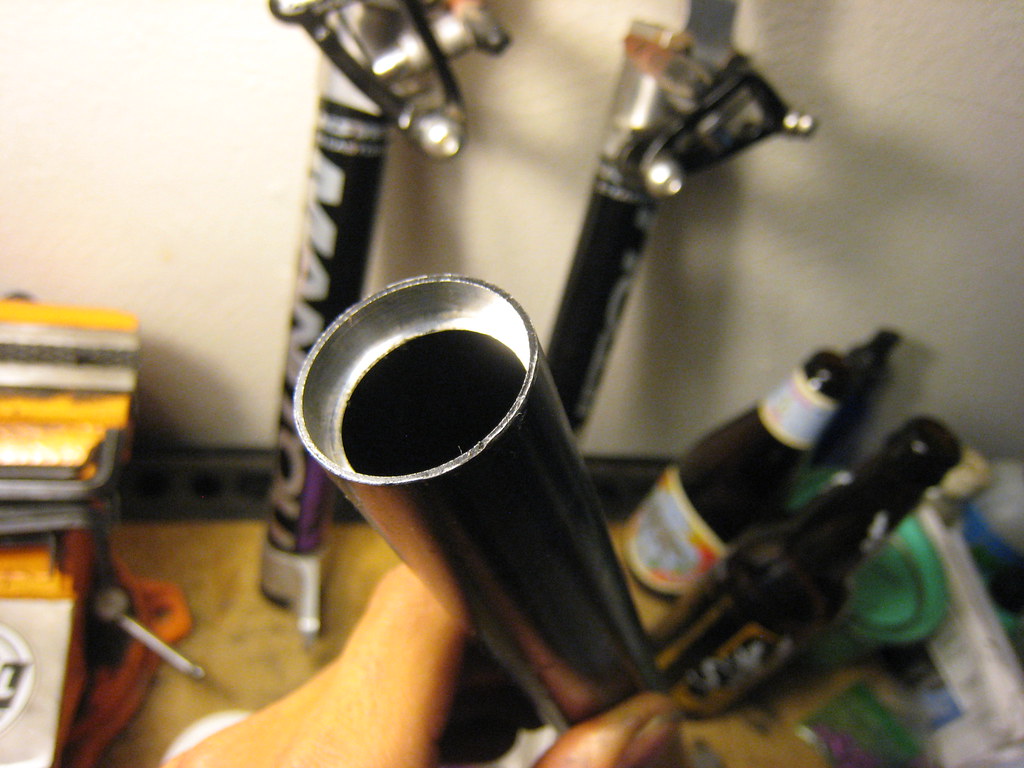
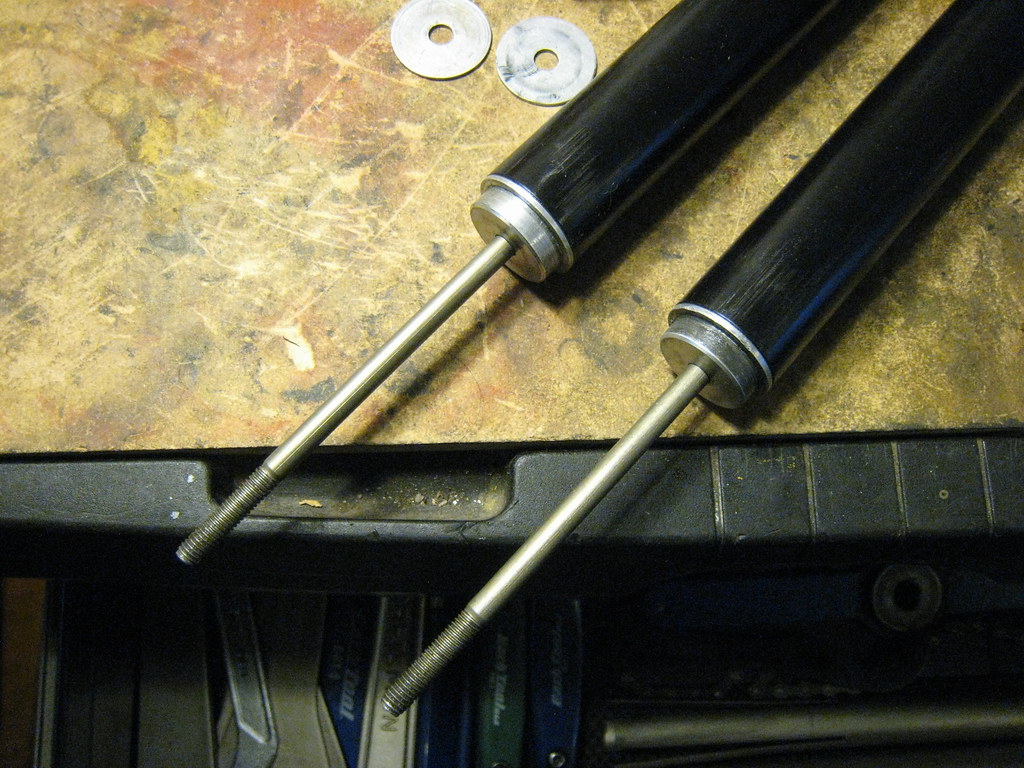
Here we start with the stanchion tubes from a manitou 3. I chucked these up in the lathe and machined away some material in order to fit the oem aluminium manitou 2 top caps. This makes for a clean setup that looks as if they were made for one another. I used the manitou 3 stanchion tubes for 2 reasons, the first being that the tubes are not externally butted, leaving more surface area for contact against the seals, and the second being that these stanchions are drawn from 7076 aluminium (at least thats what the graining revealed to my eyes after machining), and that an aluminium to aluminium concact makes much more sense (being that the two grades of 6065 [the easton e9 lowers], and 7076 [stanchions tubes] have similar hardness) and will give rise to far less scoring and thus increase longevity as opposed to 4130 chromoly riding inside of a far softer aluminium. I'm not sure why exact ally, but there appears to be scoring inside the lowers from use with the chromo stanchions. This could possibly be warn bushings exposing the inner walls to the steel. I will use a newer set of lower bushings and hope that the wear does not continue
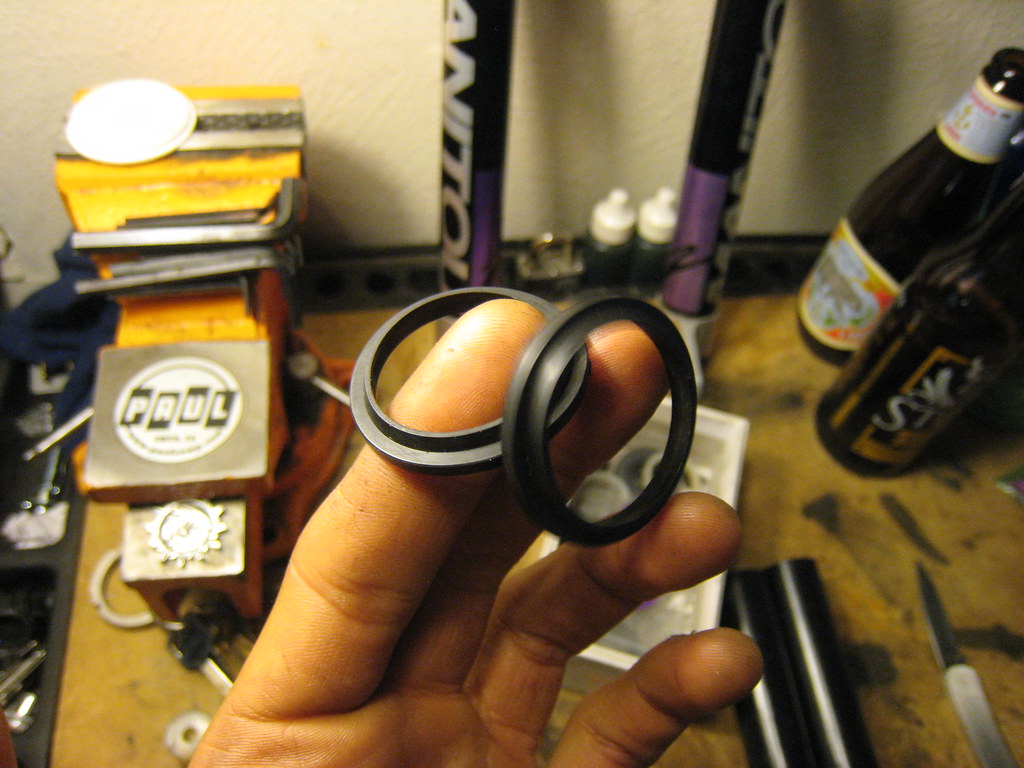
Here we have the new dust seals i just recieved in the mail. These are not factory but are molded to spec by a third party company i found on ebay. These are advertised as manitou 3 fork seals, but the first four iterations, as well as the efc, magnum, comp, and sport forks accept this seal. Its always refreshing when companies produce products that have interchangeable bits like this. Here is the link to the seals.
http://www.ebay.com/itm/NOS-Answer-Manitou-Three-3-Four-4-Fork-Dust-Seal-Wiper-Boot-SOFT-Rubber-VTG-NEW-/221244795663?pt=Cycling_Parts_Accessories&hash=item338337ab0f
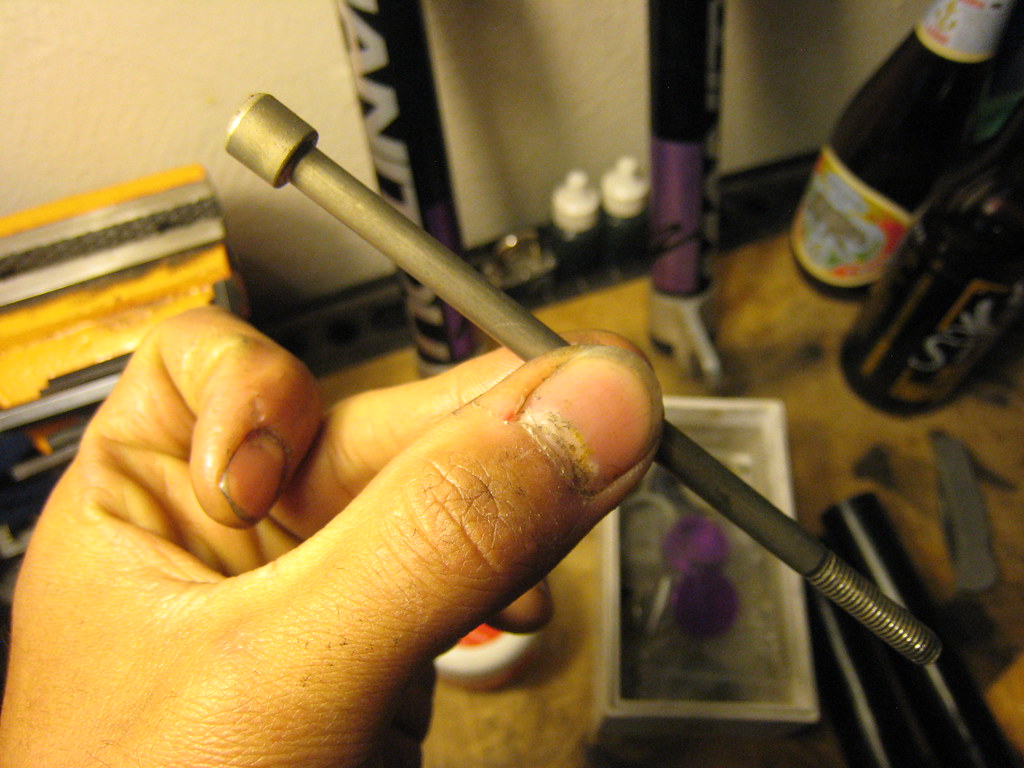
Here we have the main bolts to be used. These bolts were installed on one of the blown manitou 2 forks i purchased on ebay for parts. I opened them up to find these beautifully machined 4al6v looking titanium main bolts. [Edit] These are aluminum anodized as clarified by Elite504. Thanks you for the bit of info. I have the oem steel bolts as well but these should do the trick as well as lightening up the equation.
Here is a photo of one of the lower tubes to be used. The manitou 2 lowers are by far the most aesthetically pleasing to me and i will be using these as well as the factory preload adjustment setup fork this fork. Everything in this photo is true to the factory oem setup for the manitou 2 forks.
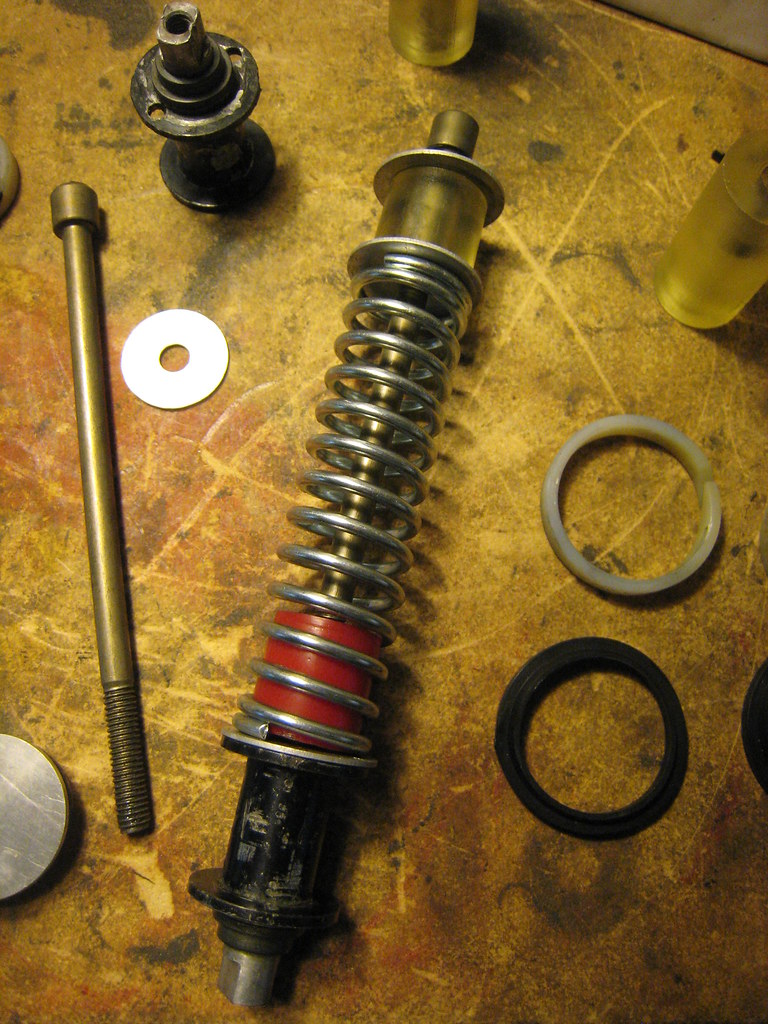
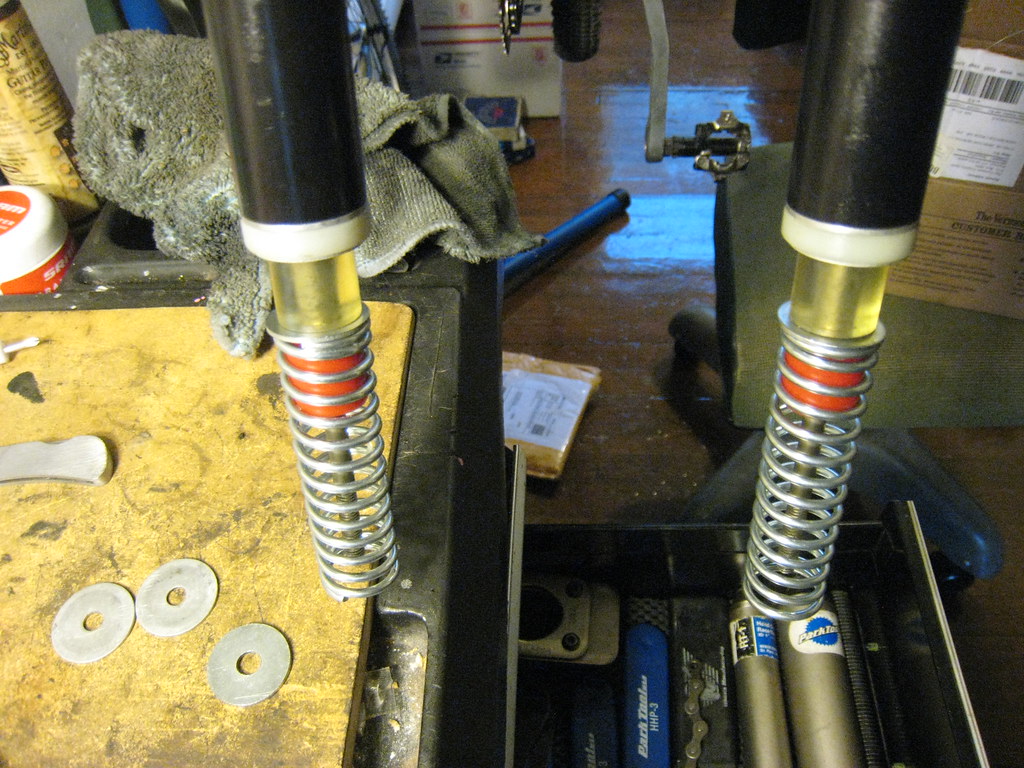
This is a photo of the coil/elastomer stack combo that i settled on. The springs are something that i dug up in a box of parts we had laying around at the shop. For my weight (130) these seemed to be perfect. The only stress testing that went into my having decided to use these springs was me pushing down on them with one in each hand against a table. The red elastomer that you see inside the springs came from a manitou comp. These bits nestled perfectly into the springs and serve as a guide to prevent the spring from moving around and scoring the walls of the lowers, as well as providing some minimal bottom out mitigation if ever needed. The washers that contact the springs were sourced from a specialty bolt and washer shop locally. These washers are slightly thicker than the oem aluminium washers provided with some of the manitou forks as well as being all stainless in design. After looking at the factory washers i was convinced that not only would the metal to aluminum contact of the two give rise to serious wear and tear, but that due to the thinness of the factory washers some bending issues might be incurred. The upper elastomer seated above the spring is a very soft manitou 2 replacement bit and is used to achieve the correct stack height needed as well as accurate preload to minimize excessive sag. I used the oem aluminium washer on the top of the stack underneath the bottom of the stanchion and delrin bushing.
Here we have the aftermarket dust seals and bushings seated, lubed up, and ready for stanchion insertion.
In this picture you can see that the main bolts are penetrating the stanchion tubes, but not depicted are the short elastomers i used for rebound. Following the elastomer is another factory aluminium washer seated beneath the top of the main bolt. Being that i am achieving roughly 1.5" (close to oem spec) of travel, this elastomer, though slightly taller than the ones outfitted to the factory manitou 2, should provide sufficient damping.
Here we have the stack mounted to the bolt, lubed up, and ready to be inserted into the lowers.
The fork has been compressed and the bolts have been tightened down adequately for compression. The fork is now ready to go (^_^)

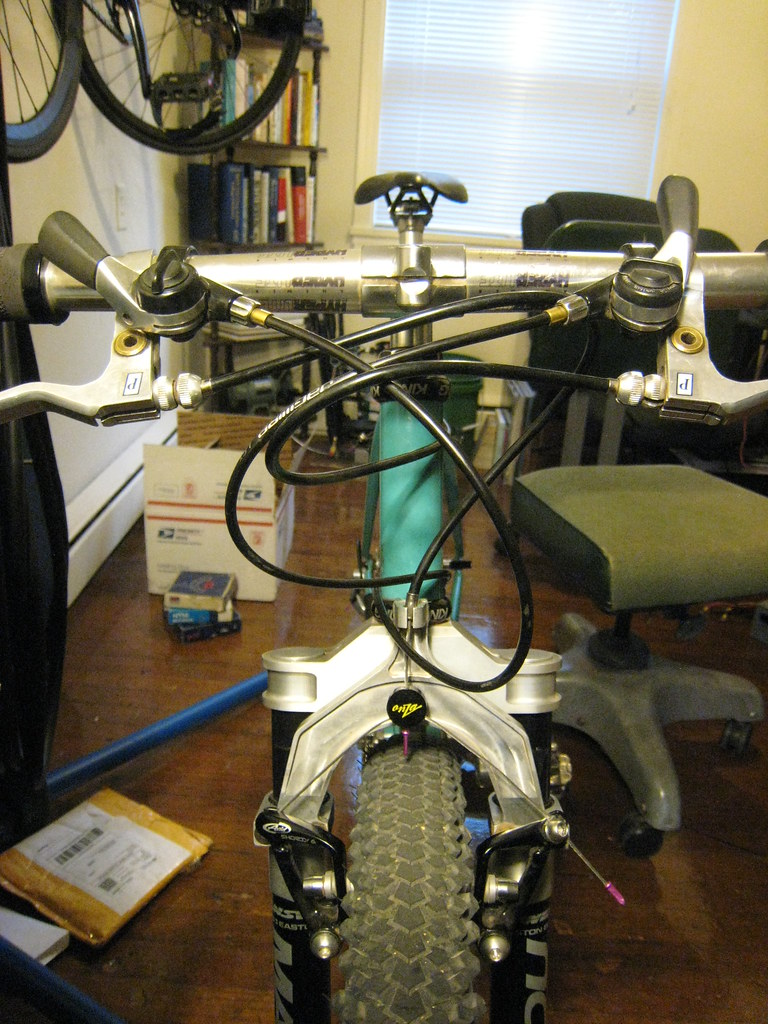
After a quick ride around the block to make sure everything was feeling good, you can see the line of my max travel. 1.5" +/- .1/.2 seems to be where i stand at this point. I am hoping that this setup will be perfect for the all round style of riding that i do with this bike. I really needed something more substantial to negotiate the poor infrastructure of the city as well as all of the hard pack/sandy/gravel roads that i find myself riding on. I would liken the feel of this fork to a very plush short travel xc fork, with good low speed compression. Some miles and testing are now in check as well as working out whatever kinks i run into with this setup. I will keep you all updated as to how this setup works in various conditions, as well as noting irregularities that i need to address. I hope this thread proves helpfull to those who have taken a similar interest when it comes to rehabilitating and reconfiguring wonderful old forks that have lots of life ahead of them. Please feel free to ask questions and make suggestions as this is all just a big experiment that will be refined over time.
To those interested, here is a link to the album on flicker containing all the photos linked above in higher resolution. https://www.flickr.com/photos/juanm_pho ... 353148972/
If anyone is interested in setting up something similar i will happily take the caliper to some of the bits for exact measurements. This was all eyeballed so i don't know most of the dimensions off hand.
Here is a blow up diagram of the original maintou 2 setup.

[edit] Had some image link issues with the initial post but have since worked them out. Cheers (^_^)
Here is the front end with the stanchions and lowers removed completely from the fork. I went with the manitou 4/eft crown because they have some nicely machined flat spots right below the top of the crown. This allows you seat the stanchions right to the top with confidence and no guess work.
Here are the essentials spread out and ready for setup.
Using Sram butter for this one.. non lithium grease is an elastomer's best friend
Here we start with the stanchion tubes from a manitou 3. I chucked these up in the lathe and machined away some material in order to fit the oem aluminium manitou 2 top caps. This makes for a clean setup that looks as if they were made for one another. I used the manitou 3 stanchion tubes for 2 reasons, the first being that the tubes are not externally butted, leaving more surface area for contact against the seals, and the second being that these stanchions are drawn from 7076 aluminium (at least thats what the graining revealed to my eyes after machining), and that an aluminium to aluminium concact makes much more sense (being that the two grades of 6065 [the easton e9 lowers], and 7076 [stanchions tubes] have similar hardness) and will give rise to far less scoring and thus increase longevity as opposed to 4130 chromoly riding inside of a far softer aluminium. I'm not sure why exact ally, but there appears to be scoring inside the lowers from use with the chromo stanchions. This could possibly be warn bushings exposing the inner walls to the steel. I will use a newer set of lower bushings and hope that the wear does not continue
Here we have the new dust seals i just recieved in the mail. These are not factory but are molded to spec by a third party company i found on ebay. These are advertised as manitou 3 fork seals, but the first four iterations, as well as the efc, magnum, comp, and sport forks accept this seal. Its always refreshing when companies produce products that have interchangeable bits like this. Here is the link to the seals.
http://www.ebay.com/itm/NOS-Answer-Manitou-Three-3-Four-4-Fork-Dust-Seal-Wiper-Boot-SOFT-Rubber-VTG-NEW-/221244795663?pt=Cycling_Parts_Accessories&hash=item338337ab0f
Here we have the main bolts to be used. These bolts were installed on one of the blown manitou 2 forks i purchased on ebay for parts. I opened them up to find these beautifully machined 4al6v looking titanium main bolts. [Edit] These are aluminum anodized as clarified by Elite504. Thanks you for the bit of info. I have the oem steel bolts as well but these should do the trick as well as lightening up the equation.
Here is a photo of one of the lower tubes to be used. The manitou 2 lowers are by far the most aesthetically pleasing to me and i will be using these as well as the factory preload adjustment setup fork this fork. Everything in this photo is true to the factory oem setup for the manitou 2 forks.
This is a photo of the coil/elastomer stack combo that i settled on. The springs are something that i dug up in a box of parts we had laying around at the shop. For my weight (130) these seemed to be perfect. The only stress testing that went into my having decided to use these springs was me pushing down on them with one in each hand against a table. The red elastomer that you see inside the springs came from a manitou comp. These bits nestled perfectly into the springs and serve as a guide to prevent the spring from moving around and scoring the walls of the lowers, as well as providing some minimal bottom out mitigation if ever needed. The washers that contact the springs were sourced from a specialty bolt and washer shop locally. These washers are slightly thicker than the oem aluminium washers provided with some of the manitou forks as well as being all stainless in design. After looking at the factory washers i was convinced that not only would the metal to aluminum contact of the two give rise to serious wear and tear, but that due to the thinness of the factory washers some bending issues might be incurred. The upper elastomer seated above the spring is a very soft manitou 2 replacement bit and is used to achieve the correct stack height needed as well as accurate preload to minimize excessive sag. I used the oem aluminium washer on the top of the stack underneath the bottom of the stanchion and delrin bushing.
Here we have the aftermarket dust seals and bushings seated, lubed up, and ready for stanchion insertion.
In this picture you can see that the main bolts are penetrating the stanchion tubes, but not depicted are the short elastomers i used for rebound. Following the elastomer is another factory aluminium washer seated beneath the top of the main bolt. Being that i am achieving roughly 1.5" (close to oem spec) of travel, this elastomer, though slightly taller than the ones outfitted to the factory manitou 2, should provide sufficient damping.
Here we have the stack mounted to the bolt, lubed up, and ready to be inserted into the lowers.
The fork has been compressed and the bolts have been tightened down adequately for compression. The fork is now ready to go (^_^)
After a quick ride around the block to make sure everything was feeling good, you can see the line of my max travel. 1.5" +/- .1/.2 seems to be where i stand at this point. I am hoping that this setup will be perfect for the all round style of riding that i do with this bike. I really needed something more substantial to negotiate the poor infrastructure of the city as well as all of the hard pack/sandy/gravel roads that i find myself riding on. I would liken the feel of this fork to a very plush short travel xc fork, with good low speed compression. Some miles and testing are now in check as well as working out whatever kinks i run into with this setup. I will keep you all updated as to how this setup works in various conditions, as well as noting irregularities that i need to address. I hope this thread proves helpfull to those who have taken a similar interest when it comes to rehabilitating and reconfiguring wonderful old forks that have lots of life ahead of them. Please feel free to ask questions and make suggestions as this is all just a big experiment that will be refined over time.
To those interested, here is a link to the album on flicker containing all the photos linked above in higher resolution. https://www.flickr.com/photos/juanm_pho ... 353148972/
If anyone is interested in setting up something similar i will happily take the caliper to some of the bits for exact measurements. This was all eyeballed so i don't know most of the dimensions off hand.
Here is a blow up diagram of the original maintou 2 setup.
[edit] Had some image link issues with the initial post but have since worked them out. Cheers (^_^)
When you click on links to various merchants on this site and make a purchase, this can result in this site earning a commission. Affiliate programs and affiliations include, but are not limited to, the eBay Partner Network.
")
