Crack identification

  • Thread starter Deleted member 53753
  • Start date
D

Deleted member 53753

So whilst trying to avoid any innuendo, does this look like a crack? It's a '92 orange aluminium elite which I've removed the lacquer on, it seems to be under the surface.

Taking pictures is proving tricky due to the shine so these are the best I have at the moment.
 

Attachments

  • IMG_20200602_101816003_HDR~2.jpg
    IMG_20200602_101816003_HDR~2.jpg
    208.3 KB · Views: 533
  • IMG_20200602_101810697_HDR.jpg
    IMG_20200602_101810697_HDR.jpg
    1.2 MB · Views: 533
It's a bit of a weird direction for a stress crack, but does have the right sort of jagged line and seems to start from a notch in the top of the headtube.

Take the headset cup out and wiggle the 'leaf' above the crack...if it's a crack, it'll move.

All the best,
 
Re:

Not easy to tell but given the little dink at the top of the headtube could that possibly be the source of a 'white worm' that's resulted from water ingress under the lacquer...? Otherwise, headset cup out and have a look on the inside the headtube and as mention, see it will move or flex... Hope its just some white worm for you :?
 
Since the lacquer's removed, if you don't want to take the cup out you could try the old engineer's trick of dribbling some penetrating oil or similar on the affected area and see if the "crack" darkens. If it does, then a repair is needed. I have no experience with aluminium frames, but know they're tricky for a few reasons, one being that after welding the job needs to "rest" for some time before it can be used. I don't mean cool down, I mean time for the crystalline structure to realign. Some kind of sleeve may be better, perhaps epoxied on.. Cheaper, stronger but not a great look.. Sorry, not much help.. All the best anyway.
 
As it's a Halifax-built Orange, I'm presuming the aluminium alloy used will be either 6083 or 6061 series, so will not gain any of the 30% or so of lost tensile and yield strength from just 'resting' or natural ageing post-weld. Different matter with 7005/7020 frames.
To regain this strength it would need a comprehensive normalising/quench/realign/age cycle. £500 or so for a one-off by serious heat treatment companies, so really not worth it for this frame.

Best to avoid any oil or even any specialist crack identification dyes...if there is a crack, any penetrants contaminate the fresh material on the inside faces of the crack, which will need extensive cleaning/detergent/degrease/acetone before welding. Fine for aerospace, but not here.
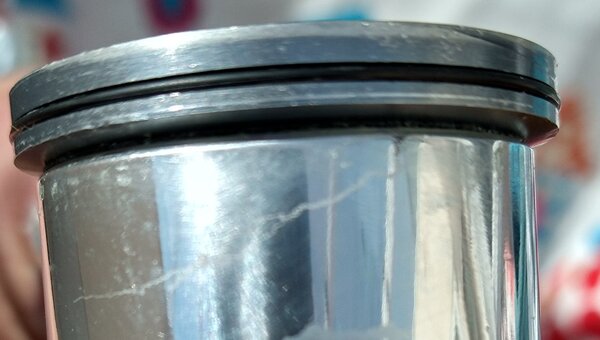
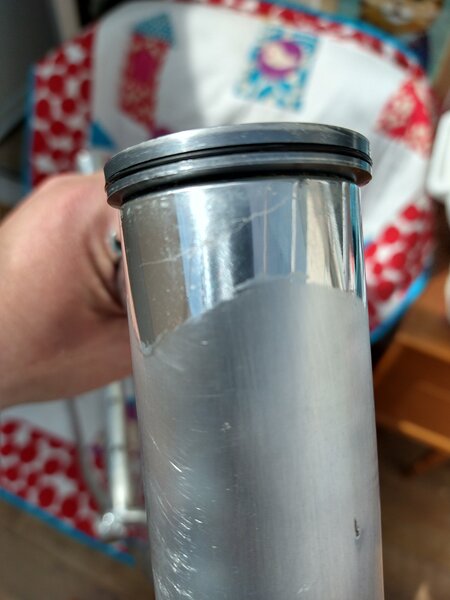
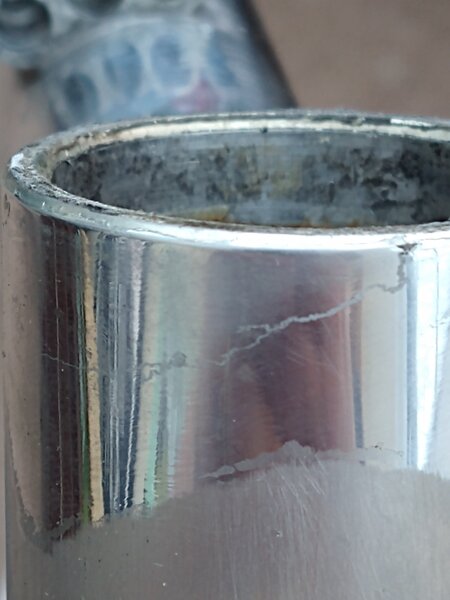
Just remove the cup and have a good look. The cup should pull out pretty easily, without much force, if that is a crack anyway, as it will probably have dissipated all the holding force of the interference fit.

An interference fit external collar would be the best approach to repair, either on its own, or ideally in combination with remedial welding of the crack.

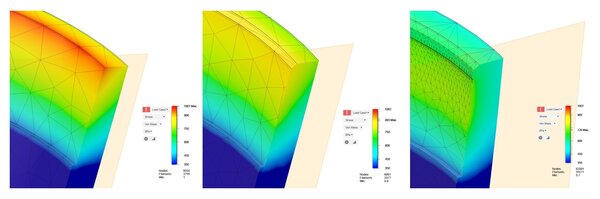
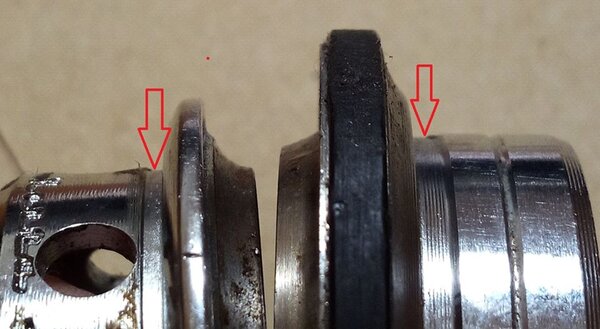
Also, best to ream and chamfer the internal edges of the headtube bore top and bottom back to the looser end of the standard tolerance (33.95 mm (+0.00/-0.05)) and, if you can, get a small relief machined into the headset cups like this:


These two measures combined will reduce bursting force by around 30% to help preserve the headtube for the future.


This is what comes of using a standard originally designed for steel frames on a different material without addressing the likely issues...

All the best,
 

Attachments

  • Annotation 2020-06-04 102310.jpg
    Annotation 2020-06-04 102310.jpg
    50.6 KB · Views: 359
  • 89679905_3431903576836328_6163767004542009344_o.jpg
    89679905_3431903576836328_6163767004542009344_o.jpg
    72.9 KB · Views: 359
Re:

Strange direction for a crack in that area. I would expect it to go down the tube for a good bit and then sometimes head left or right.

Fingers crossed.
 
Re:

Thanks for all the replies I have taken the headset cup out (which was firmly in place) whatever it is seems to just under the surface on the outside
 

Attachments

  • IMG_20200605_121508009.jpg
    IMG_20200605_121508009.jpg
    719.2 KB · Views: 273
  • IMG_20200605_121553628.jpg
    IMG_20200605_121553628.jpg
    596.9 KB · Views: 273
  • IMG_20200605_121617897.jpg
    IMG_20200605_121617897.jpg
    580.5 KB · Views: 273
Re:

Cool, phew...looks like a little corrosion worm under the paint initiated at that paint chip on the edge.
Panic over.

All the best,
 
Looks ok to me, you must be a happy bunny. Probably were when you found the top cup was still a good fit and an internal inspection confirmed it. Good photos, looks like there's a bit of corrosion about generally. Oh well. You can stand easy I reckon.
Regards,
Steve.
 
Back
Top